The Best Day Ever
June 9, 2024
Officially married as of June 9, 2024 and here is a dump of everything I planned for the wedding that no one asked for!
Open Everything | Collapse All
Part 1: The Vendors
Overall, we were very happy with all our vendor choices and would absolutely recommend them for future brides.
Venue
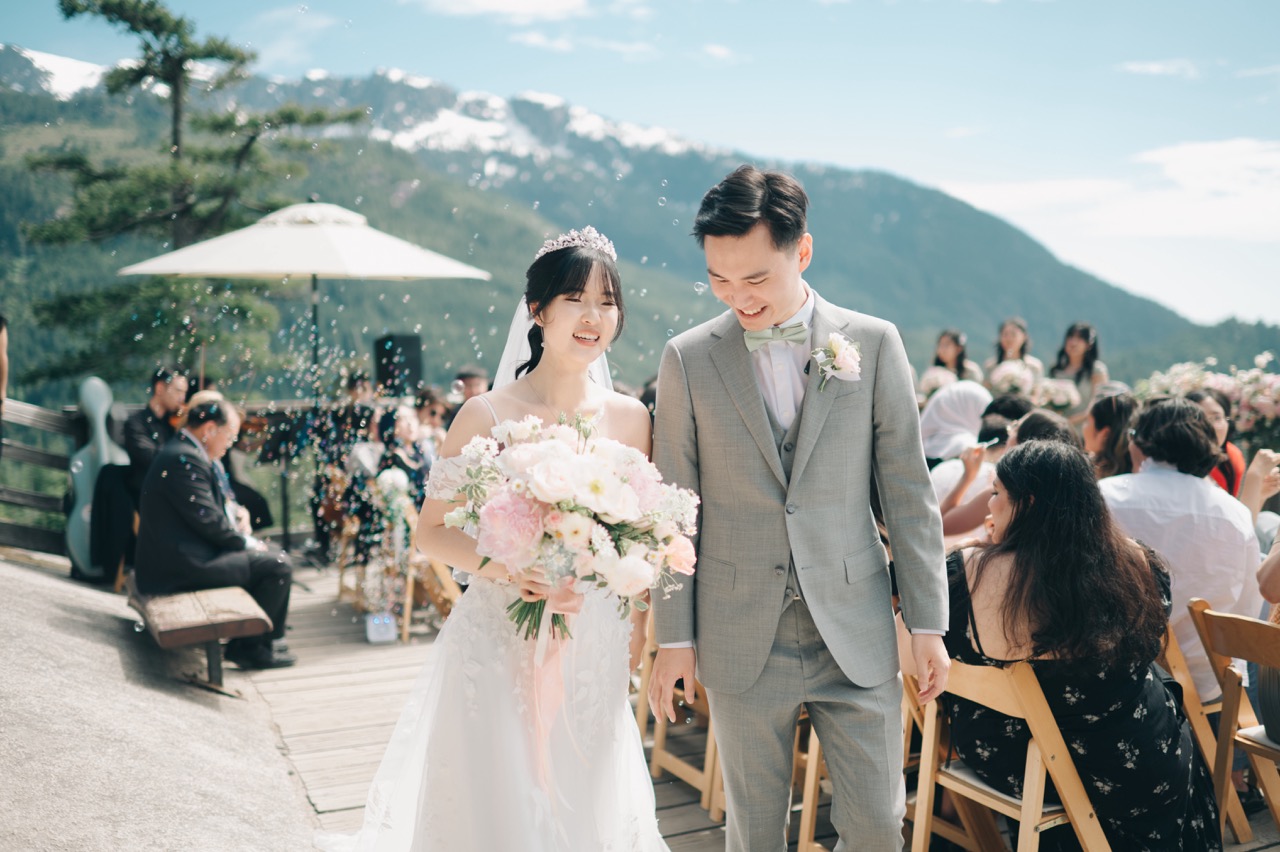
Sea to Sky Gondola
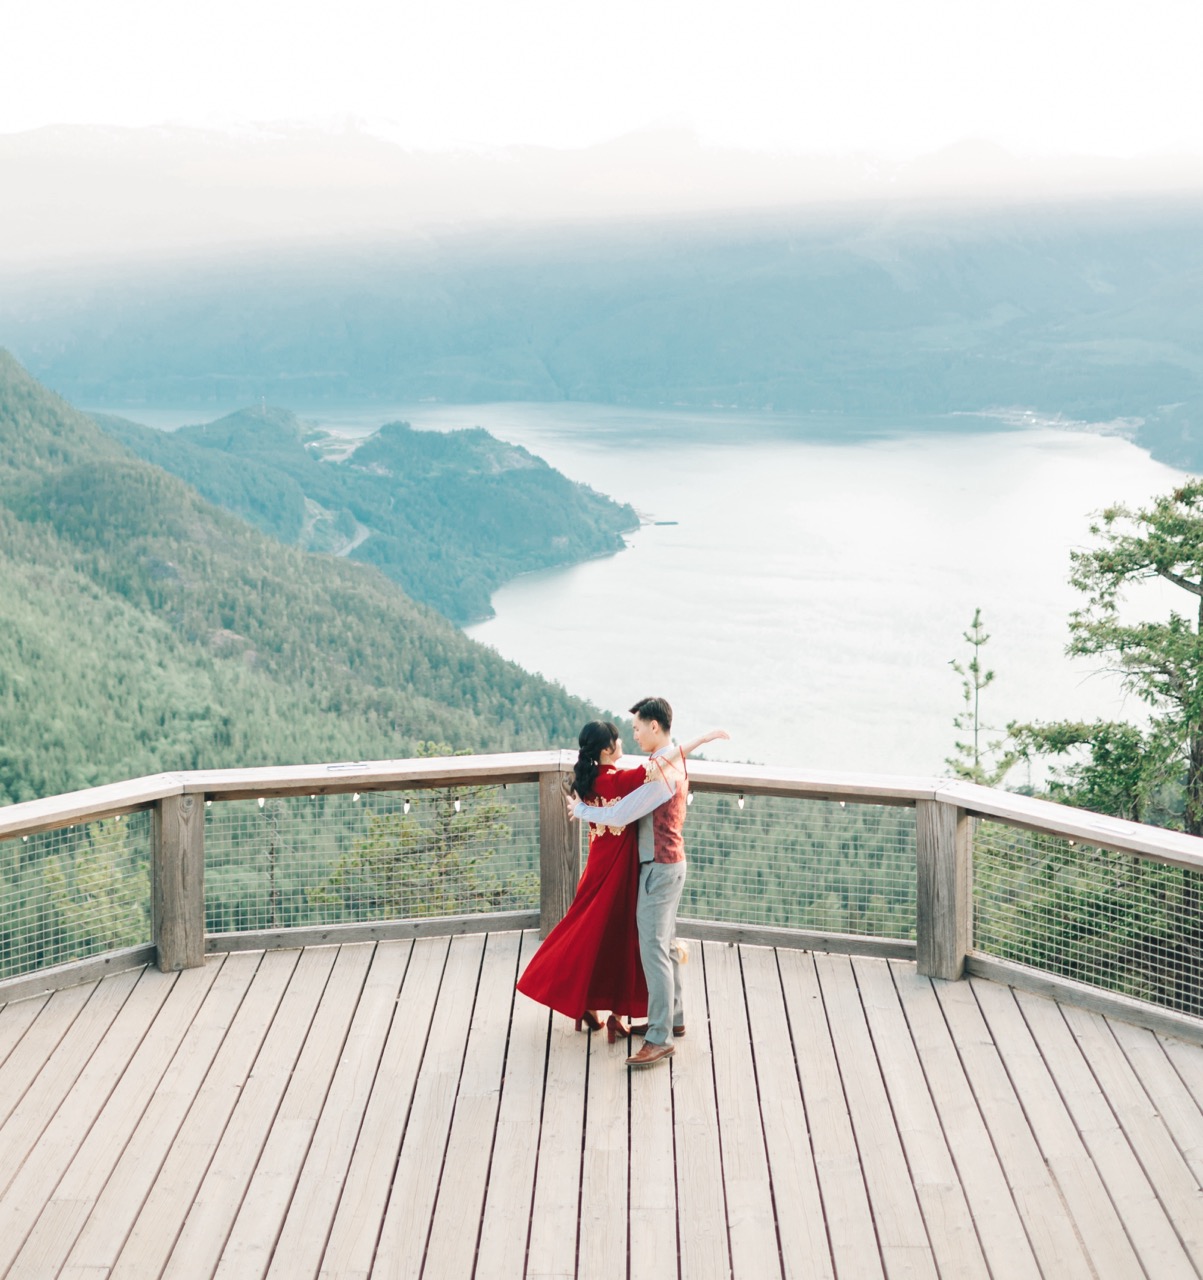
Our venue was our very first decision for our wedding. We wanted a place that represented us well and our love for the outdoors and the beautiful Pacific Northwest scenery. We also wanted a venue that was close enough to Vancouver that all our friends and family could attend, but far enough to still feel like a special location since Vancouver felt too ordinary after living here for so long.
Review
★★★★☆Our experience with the Sea to Sky Gondola team is overall very positive. There were a few annoyances along the way since they are a large organization with many rules and policies and a lot of different staff.
We worked with Fabiola for booking the venue and she also answered all our questions until a couple of months before the wedding. Fabiola was very helpful and responsive and we were very happy with her service.
Jude was the venue coordinator when we started the wedding planning process and she was super kind and we had a great time touring the venue with her. Unfortunately, she left and was replaced by Sarah, but luckily, Sarah was equally as kind and helpful. However, during this transition, we felt like a lot of venue policies also changed. For example, Jude told us that catering could be very flexible and we could even select our own alcohol options, as long as they were able to source it. After Sarah took over, we were told that was no longer an option and we could only choose from their existing supply. Overall, it felt like the venue was becoming more rigid about weddings (not Sarah's fault), but was a bit disappointing.
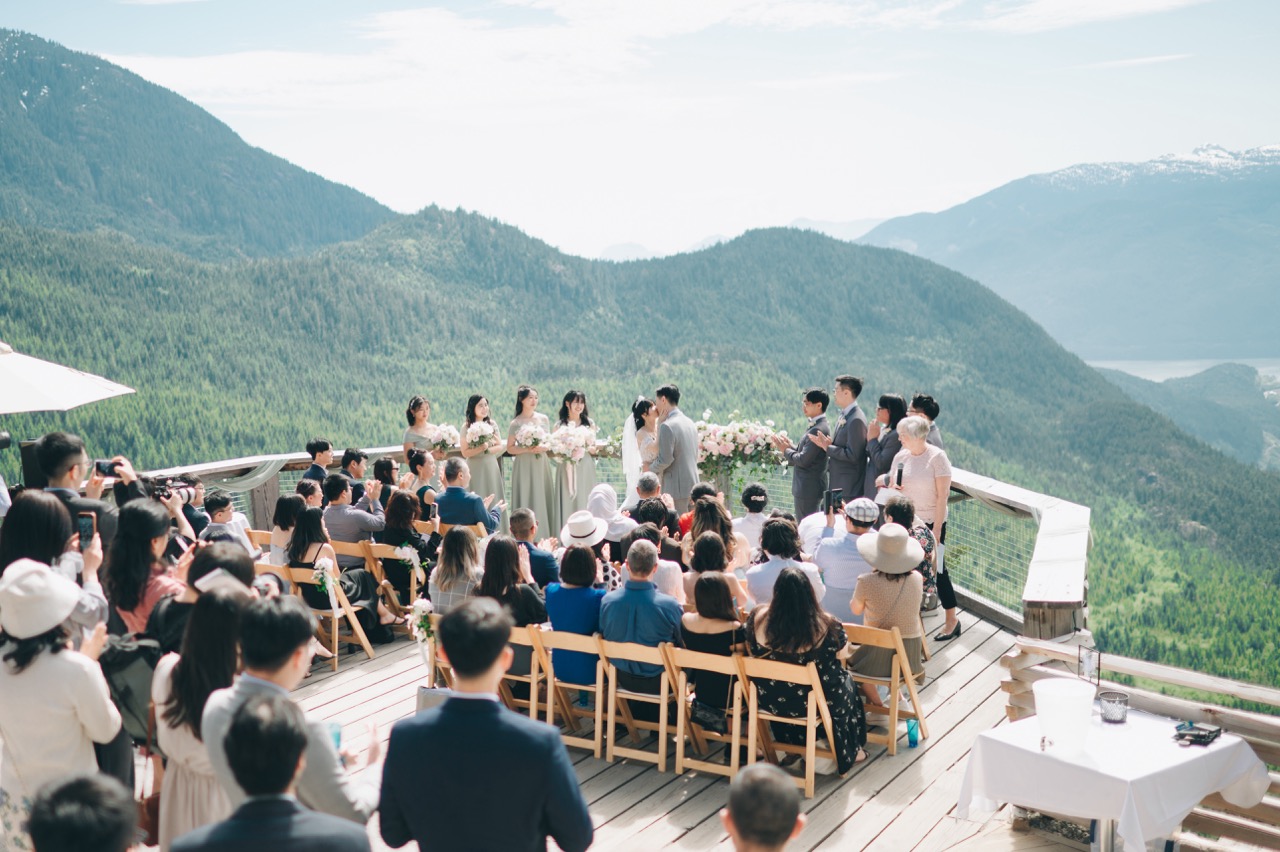
The venue itself is absolutely stunning and we were so happy with the views and the ceremony location. I had some distaste for the chairs they provided for the reception. We were told that they would be replacing the chairs for the 2024 season but they didn't end up finding a suitable replacement in time. Unfortunately, we were not informed of this until very close to the wedding date and since it was a minor detail, we decided to let it go.
All the operations staff were very professional and we were very happy with the service on the day of the wedding. A few other annoyances with the venue were the lack of flexibility for reserving the suspension bridge aisle and the ceremony location for the rehearsal. We would be willing to pay extra for these services but they were not allowed.
The catering team did a great job with the food and we were pleased by the quality and the quantity. However, they were a bit slow with the service. Not enough for the guests to notice, but enough to throw us off our schedule. It would have been much better to get a more accurate estimate of the time it would take to serve dinner so we could plan the rest of the evening accordingly.
Price
Our venue fee was $7500, which included all the Gondola tickets for our guests as well as parking and all the setup and teardown by the venue staff. We paid an additional $1400 for miscellaneous add-ons such as the 15 minute suspension bridge closure, the speaker and projector system, and an extra hour of venue time after it closes to the public.
Our catering cost was $12000 in total for 96 guests, which included a 3-course family-style dinner and a few appetizers during cocktail hour. We hosted an open bar, which totaled $3500 for the night.
Alternatives
Our top choice following the Sea to Sky Gondola was the American Creek Lodge in Hope, which we also toured. However, the venue was a bit more difficult to travel to and does not have any staff or services on site. Other options include Nita Lake Lodge, Furry Creek, and Villa Eyrie.
Wedding Planning
Love and Confetti
We chose our wedding planners from the list of preferred vendors from our venue. This was a great decision because our planners were very familiar with the venue, having coordinated many weddings there every year. They are also very close acquintances with the venue staff, with detailed knowledge of all the venues policies and procedures.
We reached out to a few other wedding planners but many were reluctant to work on wedding coordination only, and preferred partial planning and full planning instead. This makes a lot of sense since coordination relies heavily on the planning work done by the couple leading up to the wedding and can be a bit risky. Luckily, our venue is mostly full-service, so our own planning capabilities were not as important. For example, the venue provided all the catering, bar, and rentals, and we only needed to source the decor and the vendors.
Review
★★★★★The entire Love and Confetti team was amazing to work with and we were so happy with all the work they did for us on the wedding day and leading up to it. They were very responsive and super helpful with all of our questions and concerns. I was particularly pleased with their attention to detail and their ability to adapt on the fly. They made some changes to the decor setup on the wedding day based on how things actually looked in the space and it turned out so much better than I could have imagined.
Price
We chose the day-of coordination package for $2900.
Alternatives
Ultimately, we chose Love and Confetti because they were the most flexible and fastest to respond. We also got a lot of helpful information from Everes Events.
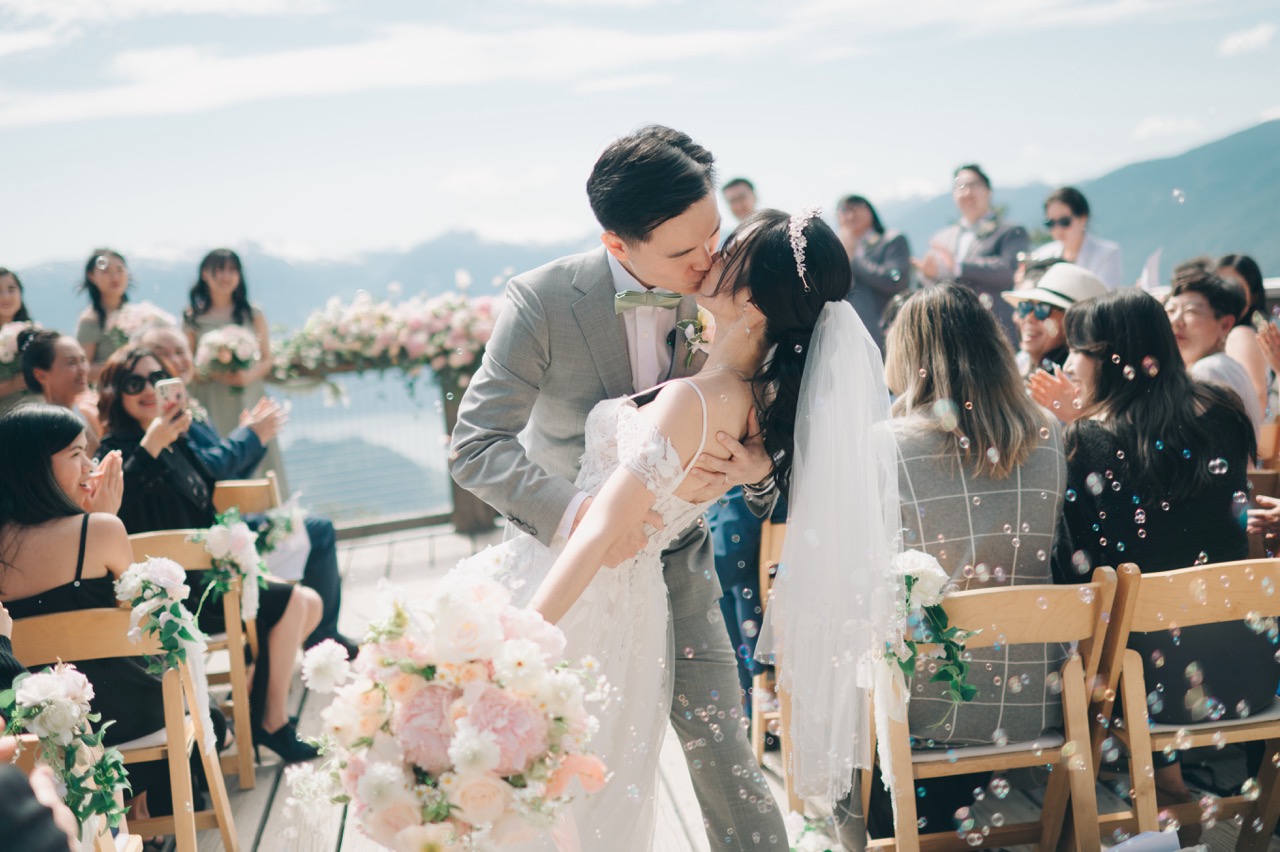
Photography
Ariel Wong Photography
After scouring through dozens of photography portfolios, we felt like none of them aligned perfectly with our vision. We really like the light and airy style but most portfolios of our venue were dark and moody or too bright and washed out. Luckily, we found Ariel through Instagram from a prewedding shoot she did at our venue and absolutely fell in love with her style! There's something special about her colours and the way she captures light that we just couldn't find anywhere else. Her price was actually much lower than many other photographers we reached out to, which was a huge bonus.
Review
★★★★★Ariel was so amazing to work with and we were so happy with our photos! She and her whole team were very professional and made us feel very comfortable in front of the camera. They all worked so hard on our wedding day and made sure to capture all the important moments. We got our sneak peek photos the next day and love them so much! It's everything I could have wished for and we can't wait to see the rest of the photos.
Price
Our 10-hour photography package was $3300 and videography was $2900.
Alternatives
A few close seconds were Nadia Hung, Love Frankly, and Beige Weddings.
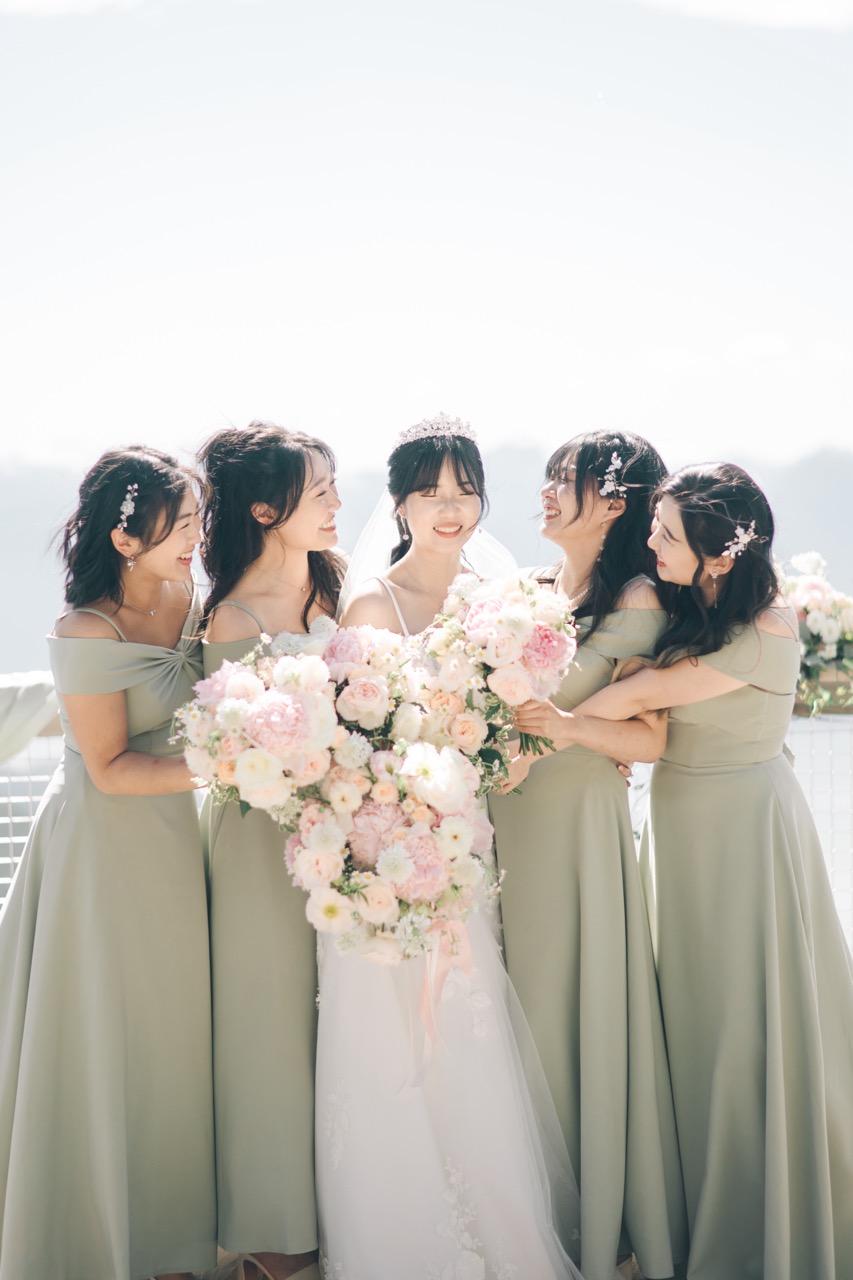
Florist
Arbutus Florist
Vivian from Arbutus Florist was a family friend and we were so happy to have her do our flowers. She is incredibly talented with a lot of experience and we knew we could trust her to make our vision come to life.
Review
★★★★★Vivian is very skilled and experienced with putting together floral arrangements and it really shows! We were very happy with all the bouquets and displays she made for us. Her team was very professional and the experience leading up to the wedding was very smooth. Her flower shop is also very cute and we loved visiting for our consultations.
I was also super impressed by the choice and quality of all the flowers she used. She was able to construct the bouquet to my vision without matching the exact flowers (since many of those were not in season). I also don't know much about flowers so I was very happy to leave it all up to her. My favourite part of the bouquet was the greenery she chose. I always disliked the strong contrasting greens in most bouquets and she chose a very soft and muted green that I've never seen in a bouquet before and it was beyond perfect.
Price
Our total floral cost was $3600, which included the bridal bouquet, 4 bridesmaid bouquets, 7 boutonnieres, 2 corsages, a 6-foot feature arrangement, cake flowers, and bud vases for the reception tables.
Alternatives
Our original choice was Chelsea Ann whose work fit our vision perfectly. Ultimately, Vivian was far more experienced and had a reliable floral shop with other staff members who could help her out, making her a much less risky choice.
My actual dream florist is Maddie Jayde, who is unfortunately based in Australia.
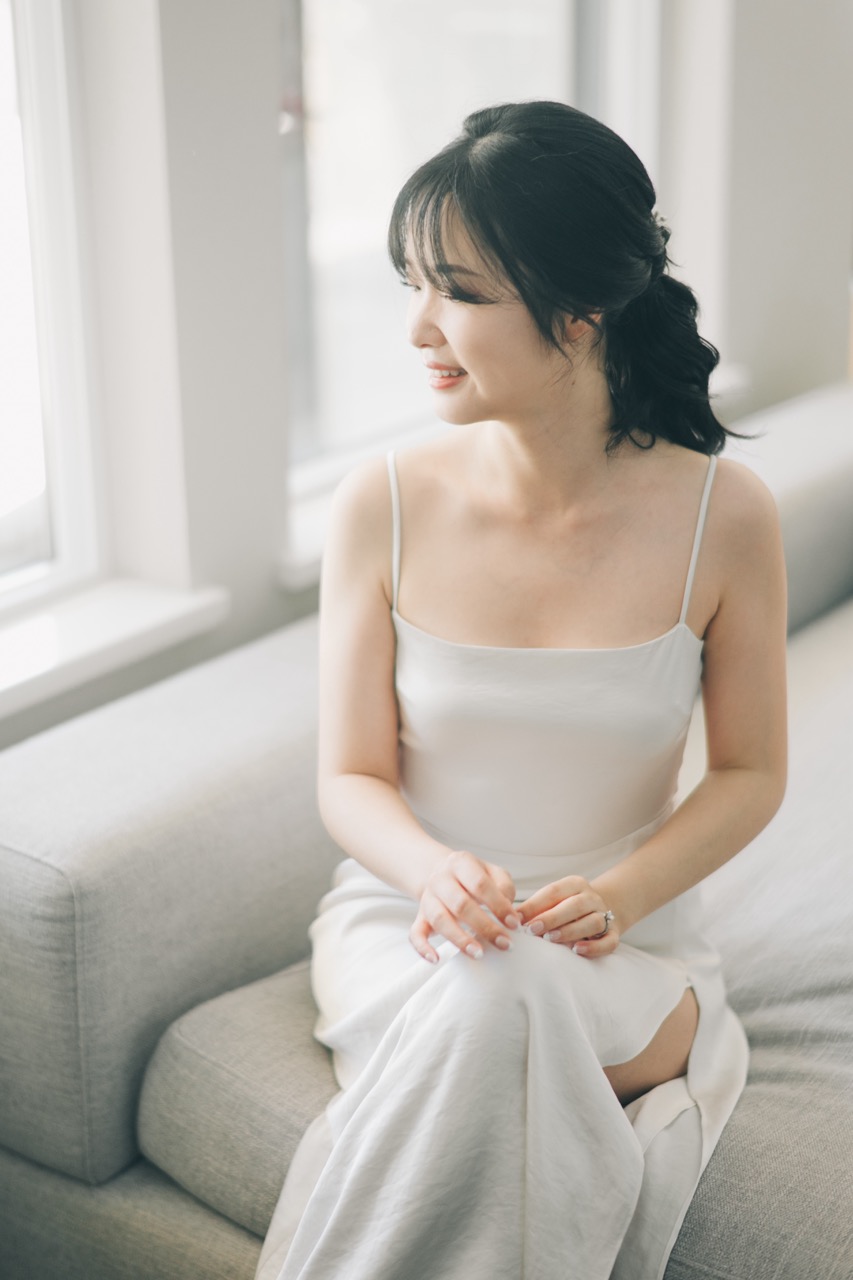
Hair and Makeup
Jeis Coco
I knew I wanted someone with a lot of experience on Asian faces and hair after all the terrible makeup experiences I had growing up. On the other hand, I also wanted someone who could speak English very well so I can communicate what I want clearly. Jeis fit all the criteria perfectly and I was so happy with my hair and makeup on the day of the wedding. In the year between booking with Jeis and the wedding, several other brides I know also booked with her so I knew I was in good hands.
Review
★★★★☆Jeis was absolutely perfect and I loved my hair and makeup so much! She's very talented with lashes, which I can never get right myself. She's also amazing with all kinds of hairstyles and I got exactly what I wanted just by showing her a few inspo pictures. The only complaint is not to Jeis but the assistant she brought with her for my bridal party. The assistant was nowhere near as experienced as Jeis and every single one of my bridesmaids disliked their hair and makeup, even after voicing concerns to the assistant, and ended up redoing things themselves, which I only found out after the wedding.
Price
The total cost of the hair and makeup package was $1600, which also includes my 4 bridesmaids and my mom at $185 each, and travel fees. I opted out of a trial since Jeis did my hair and makeup for my pre-wedding photoshoot as part of a separate pre-wedding package from Charlie's Studio.
Alternatives
I also considered Ora Chen, who unfortunately felt that Squamish was too far for her to travel to.
Ceremony Music
Lyla Lee
I love the sound of the cello and knew I wanted a cellist for our ceremony music. To round out the sound, we decided on a string trio, which fit the venue perfectly.
Review
★★★★★Although we didn't get to hear much of the music ourselves, we were very happy with the sound and the atmosphere it created. Lyla was very professional and played beautifully. Since she had a minimum booking time longer than our ceremony, they also played a few more songs while we were taking family photos and it made the whole experience so much more special.
Price
Our string trio was $700 for 1.5 hours of music from when the guests arrived to after the ceremony.
Alternatives
We also reached out to Syrinx String Quartet, but their quote was much higher than Lyla's.
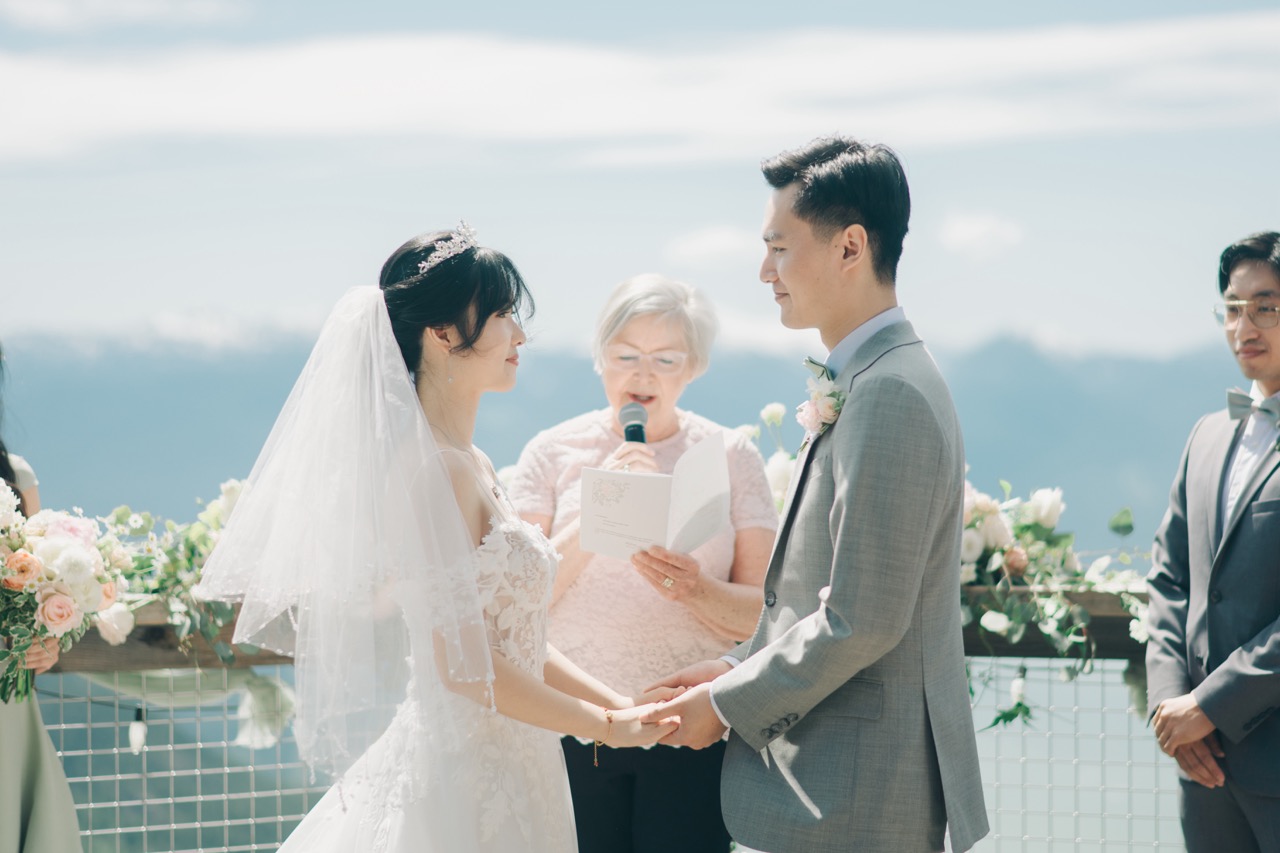
Officiant
Antje Cavanagh
Unlike the movies, not just anyone can officiate a wedding. In BC, you can either go with a government-appointed commissioner, a religious officiant, or a certified celebrant. Since we are not religious and we also didn't have anything special we wanted to include in our ceremony, we went with the government option. A benefit of this option is that the government has preset rates and policies, which made the whole process very easy. We found Antje through the list of local officiants on the BC government website and we were very happy with her service.
Review
★★★★★Although government commissioners are only required to read the official script, Antje went above and beyond and customized the ceremony to us almost like a celebrant would. She was very professional in all our meetings and super organized with all the paperwork. She prepared a ceremony program for us ahead of time and made sure we were happy with everything. She also attended our rehearsal and made sure everything ran smoothly on the day of the wedding. She even took care of mailing our marriage certificate to the government after the wedding. She definitely did more than was required of her and we appreciate it all so much!
Price
We paid $200 for the officiant service, including travel fees and the rehearsal.
Transportation
Squamish Connector
We knew most of our guests would prefer to drive to the venue but not all guests could, so we arranged for a shuttle service from Vancouver to Squamish. The Squamish Connector was the perfect choice because they already run a service from Waterfront Station to the Sea to Sky Gondola. The only problem was that their schedule didn't align with our wedding schedule, but luckily they also offer private charters.
Review
★★★★★Communication with Squamish Connector can be a bit slow, especially during the off-season when they're not fully staffed. Luckily for us, we planned very far in advance and the delays were not a problem at all because they did still consistently respond. They were also very flexible and we didn't need to finalize the specific time and location details until a few weeks before the wedding.
We were also very happy with the experience they have since they run the same route regularly. They provided a very accurate estimate of the time it would take to get from Vancouver to Squamish and back, which was helpful for our planning. Feedback from our guests was positive and they were happy with the service.
Price
Our 24-passenger shuttle roundtrip between Vancouver and Squamish was $1000.
Alternatives
We also considered Perimeter Transportation, but they were much more expensive and couldn't match the quote we got from Squamish Connector.
Cake
Cassandra Cakes Co
We had a very clear vision for our cake, which was a simple two-tiered cake and we planned to have additional desserts for the guests. A lot of our favourite cake shops were more focused on smaller birthday cakes and we wanted a baker with more experience with wedding cakes. Also, wedding cakes get very expensive very quickly and we didn't want to spend too much money on a cake that would mostly serve as a photo prop.
We went through a few different wedding cake tastings and Cassandra Cakes Co was a great option for the price and the taste. Most importantly, they operate a physical store which gave us more confidence in their reliability and quality.
Review
★★★★★Our wedding cake matched the sketch we provided perfectly and I loved it so much! The cake was delicious, albeit a bit stale by the time we got to eat it. Transporting the cake was a bit of a challenge since our venue was on top of a mountain and the cake was very delicate. We chose to drive the cake up ourselves because the quoted delivery fee from Cassandra Cakes Co was higher than we wanted.
Price
Our two-tiered cake serves 40 for $450.
Alternatives
We had a fantastic cake tasting experience with Bun Appetit, whose cakes were so beautiful but we were worried she didn't have enough experience, and Salty Sugar, who had such amazing flavour offerings but we were worried our guests wouldn't like the flavours as much as the more traditional options. We're definitely keeping both of them in mind for other events in the future.
Photo Booth
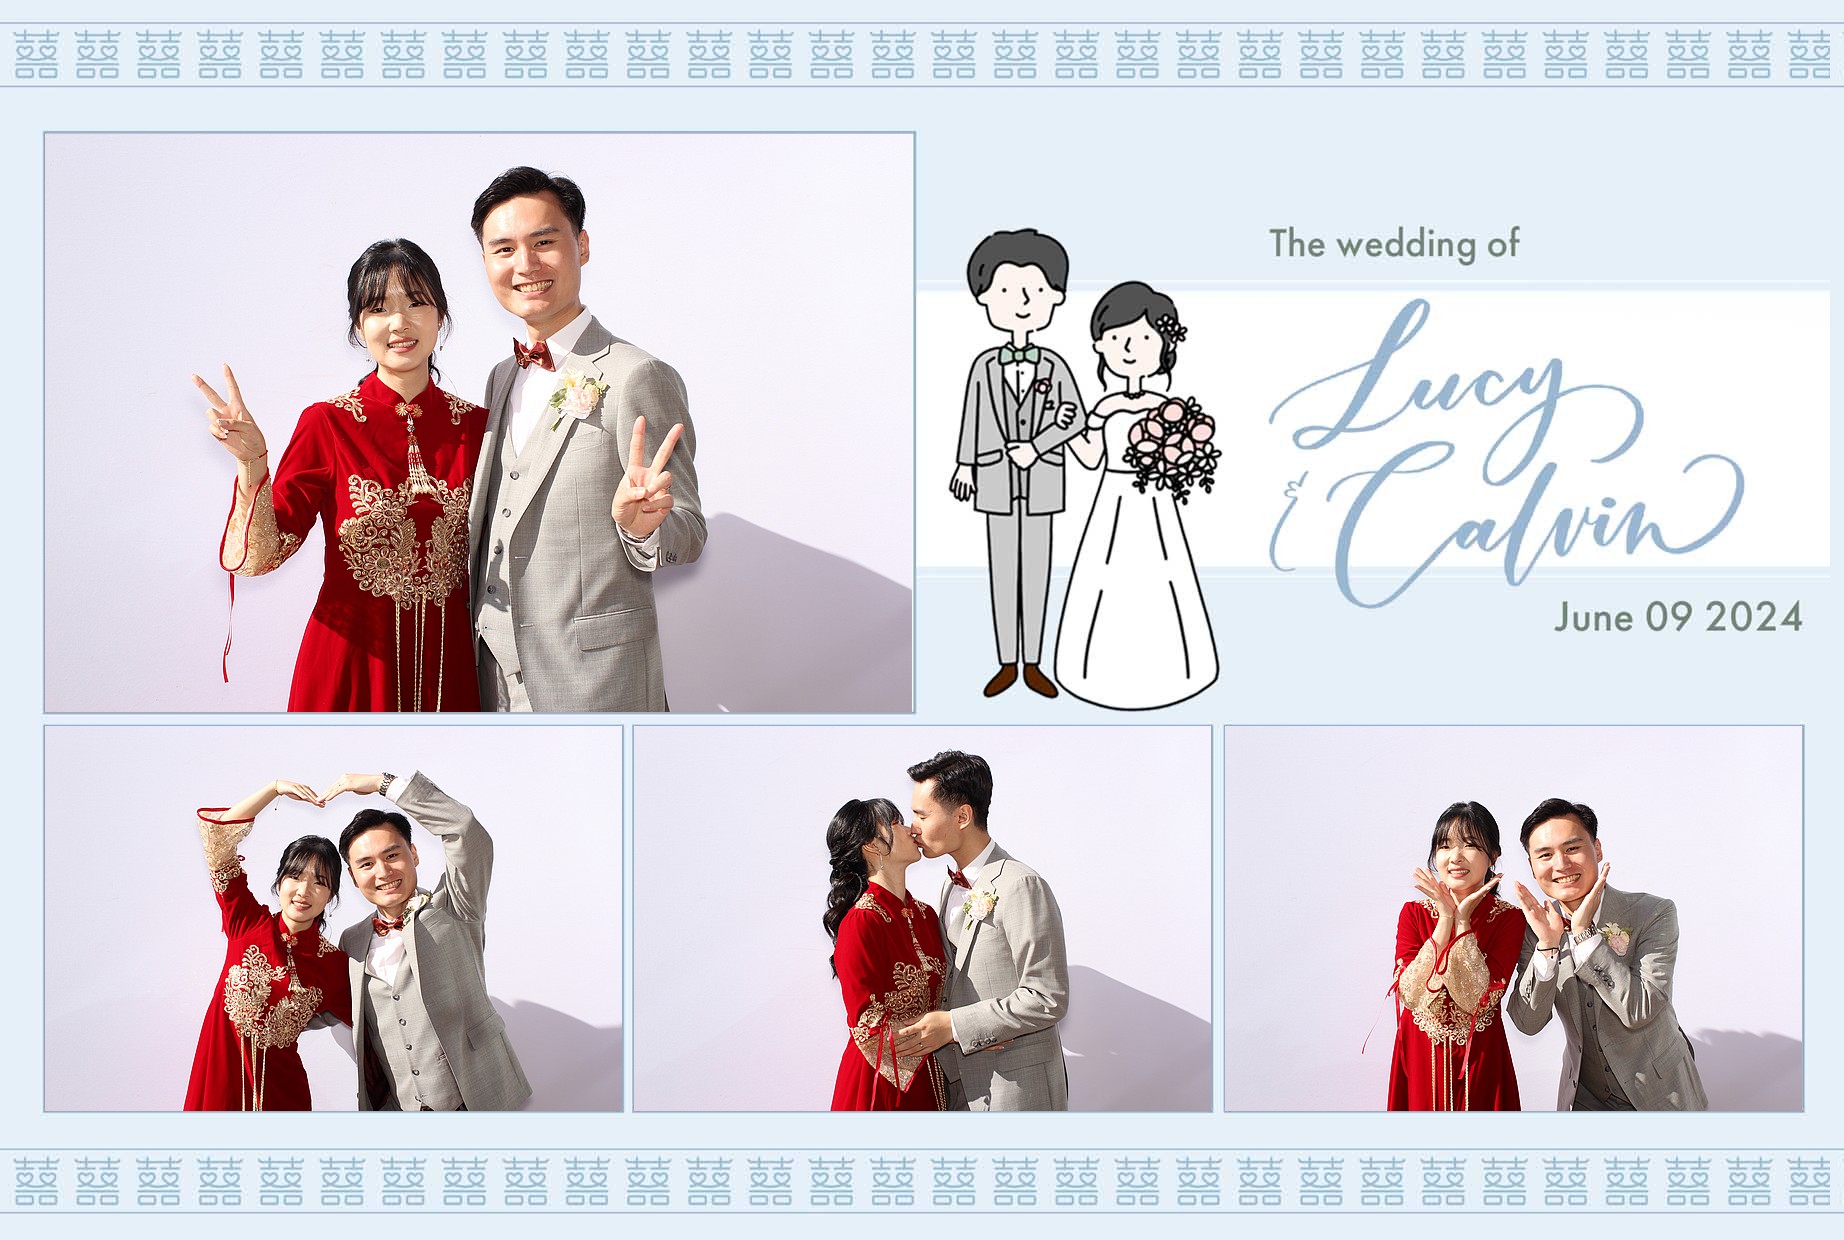
Sparks Photobooth
Turns out photo booths are almost an expected part of weddings now and so we obliged. We chose Sparks Photobooth because they were the most affordable option, had a lot of great reviews, and have done a wedding at the top of the Gondola before. We didn't want to spend too much money on a photo booth since we felt the expensive ones were only marginally better than the cheaper ones.
Review
★★★★★Raman from Sparks Photobooth was very responsive and accomodating. Communication was smooth before the wedding and everything was set up perfectly on the day of. We were happy with the results and the guests had a great time with the photo booth.
Price
Our 2-hour photo booth rental was $550.
Alternatives
We also really liked Photoby.me which had such a cute setup but a high travel fee.
Wedding Dress
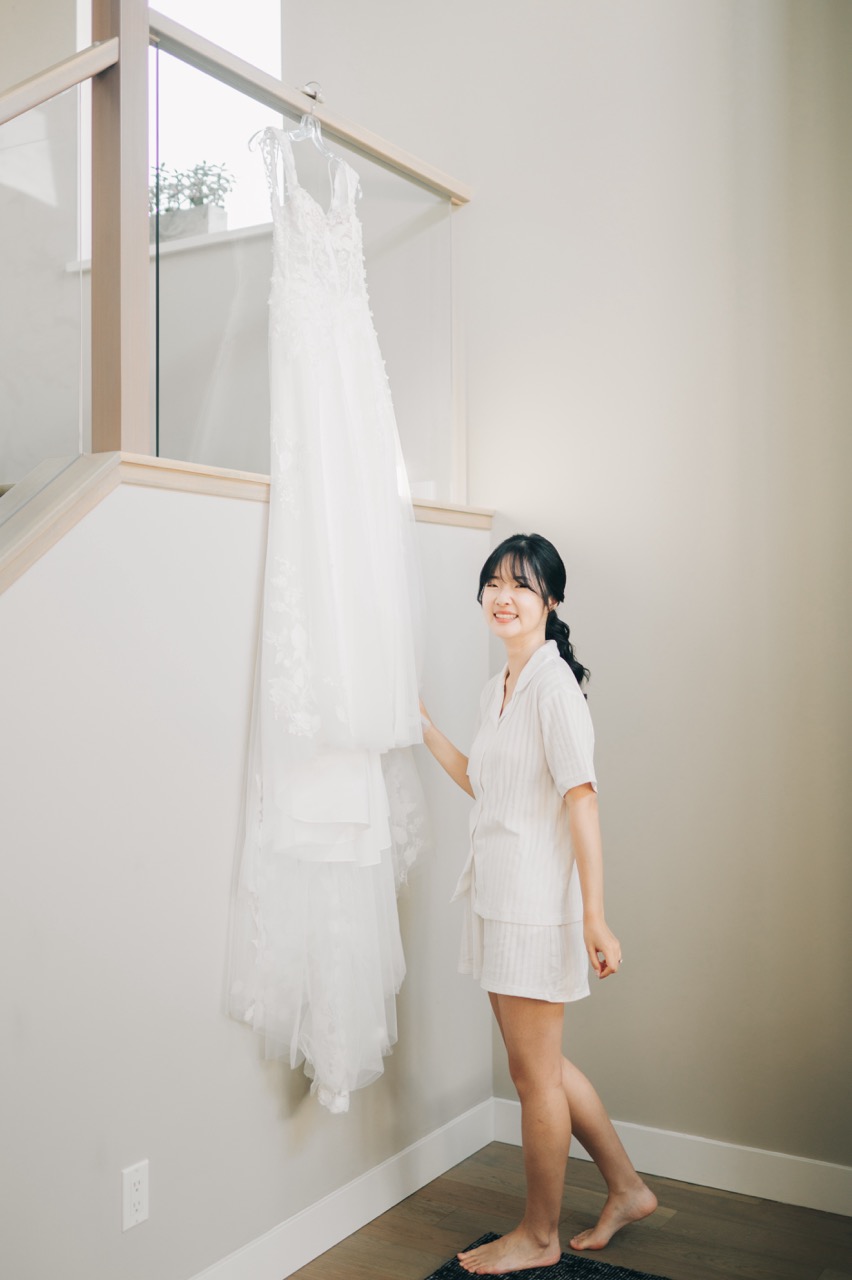
Lisa's Bridal
Trying on wedding dresses is a very interesting and unexpected experience. I thought I knew what I wanted but actually wearing the dresses was much different. It's also much more tiring that I expected because the dresses are super heavy and you're standing for hours at a time. After a while, the dresses kind of blur together and it becomes much harder to make a decision. It was also very difficult to justify the high prices for a single day of wear and it was very tempting to settle for a cheaper dress or rent. In the end, I'm happy with my dress and I grew to love it more and more as the wedding day approached.
Review
★★★★★I had a great experience at Lisa's Bridal and I was so happy with my dress. They had a huge selection of dresses compared to some of the other boutique shops I visited, which really helped me narrow down what I wanted. Nothing too special about my experience, but I'm very grateful that nothing went wrong with my dress or alterations and the price was very reasonable. The only thing was the snap buttons that held the off-shoulder sleeves on my dress kept coming undone and was something that should have been adjusted during alterations.
Price
My dress was $1800 and alterations were $450.
Alternatives
I also visited Novelle Bridal Shop and Vimo Wedding and had great experiences at both. Unfortunately, the samples dresses at Novelle were all in larger sizes and I couldn't get a good idea of what the dress would look like on me. Vimo had a much better range of sizes for me but ultimately I didn't find anything I liked as much as the dress I got from Lisa's Bridal.
Pre-Wedding
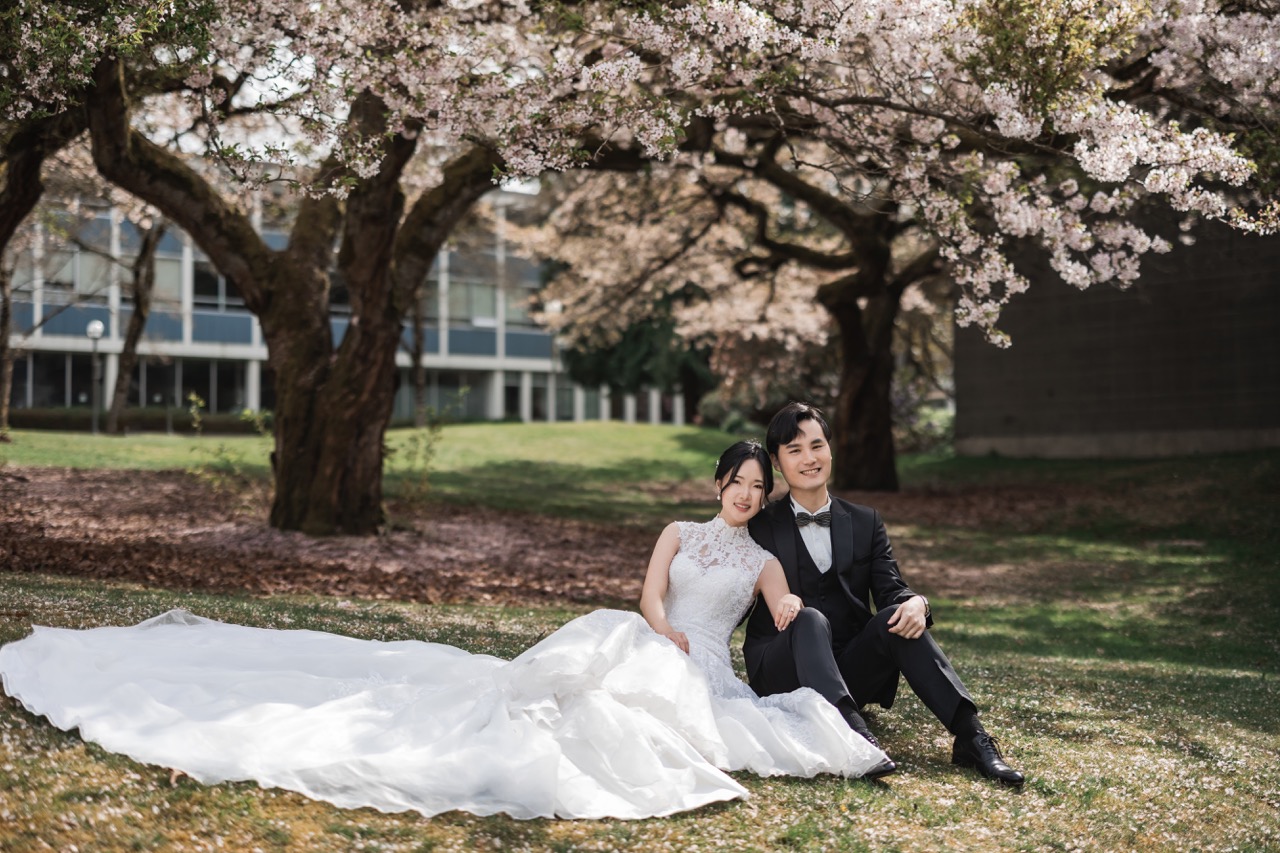
Charlie's Studio
We decided to do a pre-wedding photoshoot because we didn't want to do a first look on the wedding day so we knew we wouldn't have much time for posed couple photos on our actual wedding day. Also, we had no idea what the weather would be like on our wedding day and wanted to guarantee some nice photos of us in wedding attire.
There were also a lot of other benefits:
I had the opportunity to take advantage of my hair and makeup trial and see everything all together.
I got to take pictures in another wedding dress. I chose a more practical option for the wedding day due to logistical reasons, and I was super pleased that I got to take pictures in a different wedding dress too. The one I picked for the photoshoot was a mermaid style dress that was nearly impossible to walk or sit in, but looked great in photos.
We got to take pictures in a different location. Our wedding venue is fully outdoors and didn't have any architectural features to take photos with. For our pre-wedding, we were able to get a variety of different scenery.
I love cherry blossoms but ultimately didn't plan for them to be part of our wedding. So, for the pre-wedding shoot, we made sure to get shots with cherry blossoms.
Review
★★★★☆Our experience with Charlie's Studio was super great right from the start. Ivy was very helpful and thorough with explaining how the whole process works and showed us all the different packages that they offer.
We chose to have our photoshoot during April to capture the cherry blossoms. Unfortunately, the cherry blossoms bloomed early this year so we missed the prime window, but that was entirely our own fault because Ivy was very organized and did try to rebook us to an earlier date. Regardless, we still got all the photos that we wanted.
Picking out the dress rentals was also a super fun experience. They have so many gorgeous wedding gowns and evening gowns to choose from and I was able to find exactly what I was looking for. Their selection of wedding gowns was definitely better than the evening gowns though, but luckily, they had a new arrival that I absolutely loved! The new arrival had an additional surcharge which was a little bit annoying but it was still worth it. They were able to alter both dresses to fit me perfectly for the shoot.
Just before the photoshoot day, we were informed that there wouldn't actually be an assistant with us to help me change into the dress and swap out hair accessories, but we could add one for an additional $150 charge. This was the only negative aspect of our entire interaction with them, because I wish they were more transparent about it from the beginning.
We got our edited photos back promptly around 3 weeks after the photoshoot and it was way more pictures than we expected, so that was super nice. Our fine touch-up photos were ready about a week after we made our selections and we have no complaints!
Price
Our pre-wedding package was $4200 for 2 dress rentals, tux rental, hair and makeup, and photoshoot with 1 indoor and 1 outdoor location. We got all the photos from the shoot (more than 100) and 25 fine touch-up photos.
Alternatives
We also really liked HN Weddings and actually preferred their style over Charlie's Studio. They had a very similar package, but we inquired too late and they were very booked up for the cherry blossom season.
Cultural Photoshoot
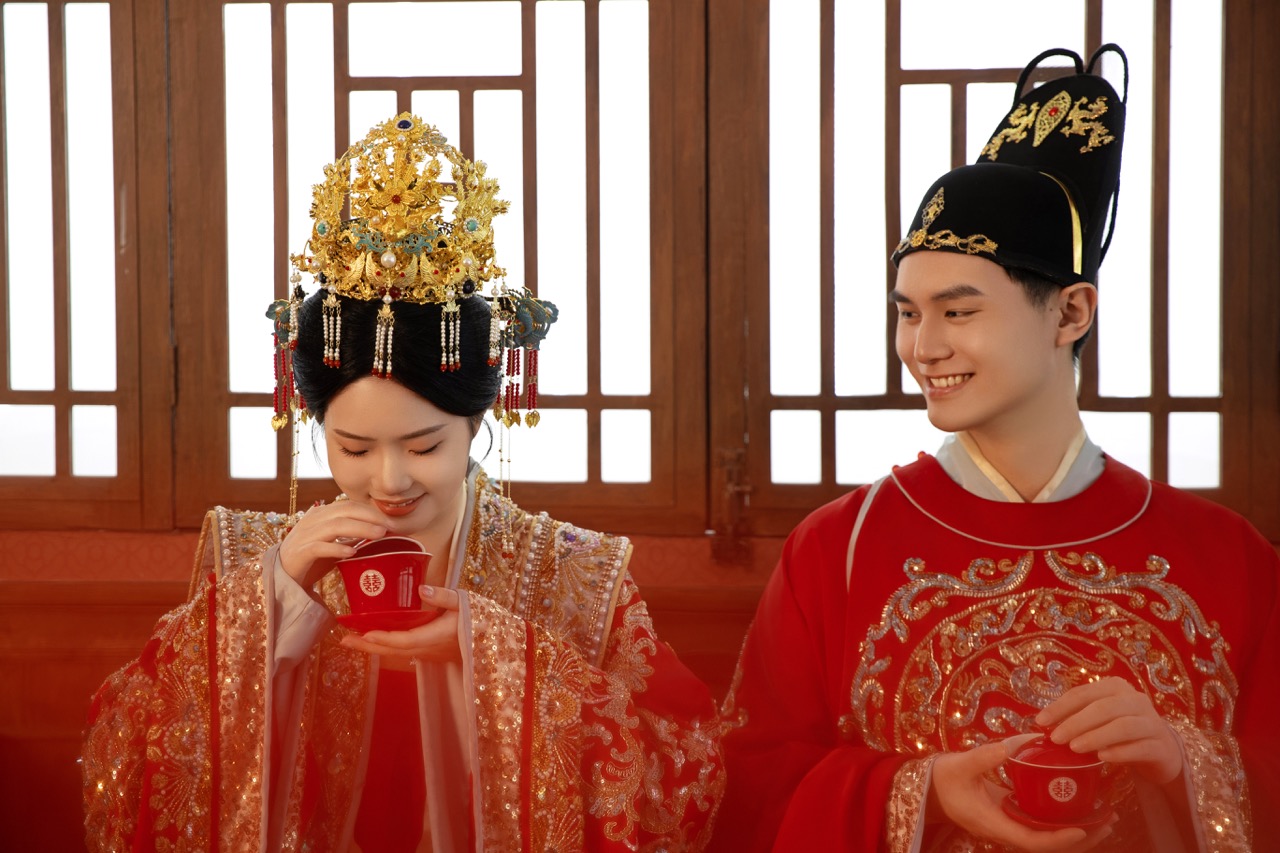
Paris Spring 巴黎春天
Since we were visiting China before our wedding, we decided to do a cultural photoshoot in traditional Chinese attire. Paris Spring is a chain photo studio in China recommended to us by family, who also helped us make all the arrangements.
Review
★★★★★There's something to be said about the efficiency of Chinese companies. The studio was very professional and communicated with us through Wechat leading up to the photoshoot. They had a huge selection of traditional Chinese outfits to choose from, but the staff was very helpful in narrowing down the options which made the process much faster. We spent nearly the entire morning on hair and makeup and they did a fantastic job. The photo studio was very busy but they were really organized and strategic about coordinating between different couples. There were several different rooms with different backdrops and we were able to get a lot of different shots in a short amount of time. The photographer was also super experienced and knew exactly how to pose us and where to shoot from. He was deleting shots as he went so at the end he had exactly the best shot for each pose.
We got all of our edited photos back the next day so we can choose 30 for fine touch-ups, which they finished in just a week. They were so fast compared to our pre-wedding photoshoot in Vancouver and we were so happy with the results.
Price
Our package was only $500 CAD for 2 outfits, hair and makeup, and photoshoot with 30 fine touch-up photos, and all RAW photos. This was a huge steal compared to the pre-wedding photoshoot in Vancouver.
Engagement Shoot
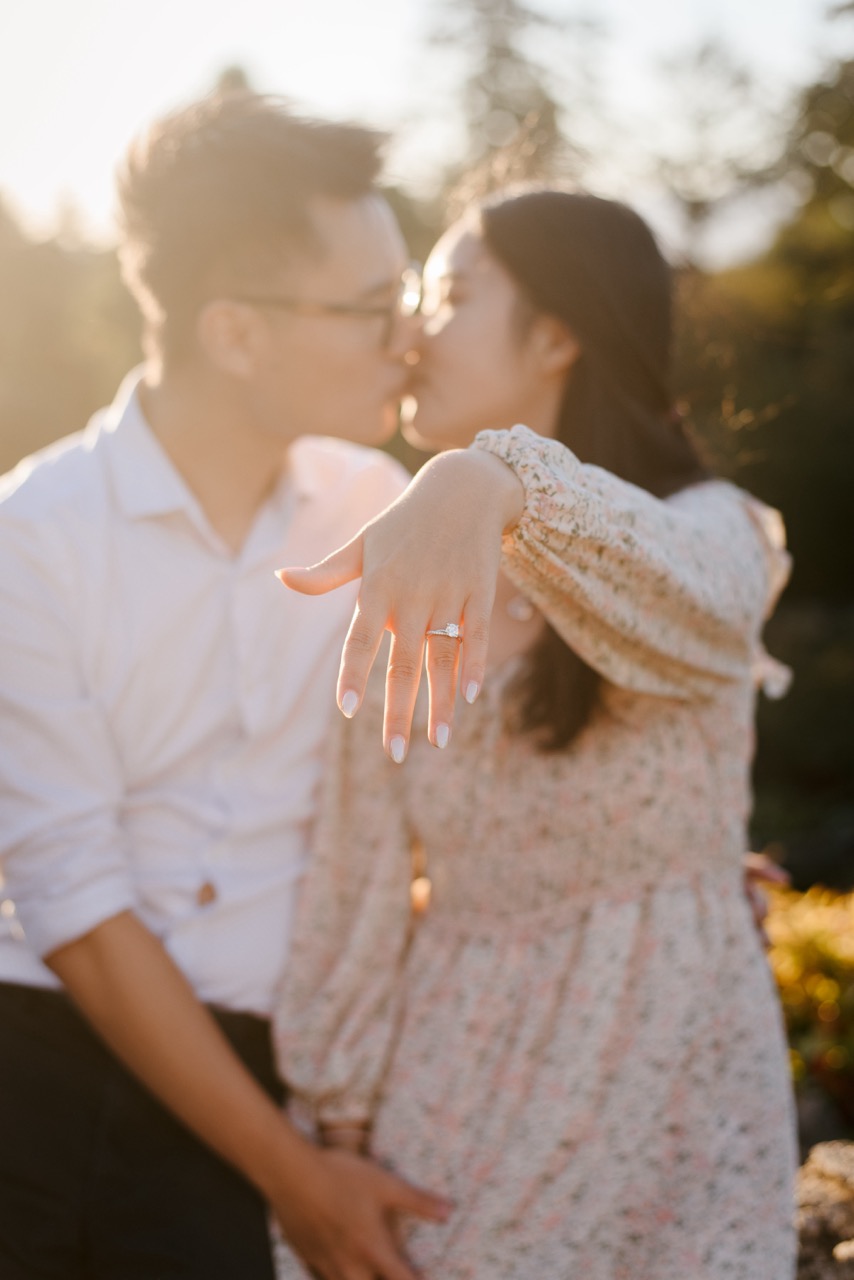
Samantha Chan
We hired Samantha Chan for our engagement shoot so we can have professional photos to commemorate the occasion. It was really fun to have a photoshoot right after the proposal and we got to use the photos to share the news with our friends and family.
Review
★★★★★Samantha was so great to work with and very professional. She was also super quick about getting all the photos to us so we could share them the very next day. We were very happy with the results, especially because it was super windy that day and my hair was all over the place. She was able to edit that all out and we got some really great shots.
We didn't choose her for our wedding day because we wanted a different style of photography, but we would definitely recommend her for engagement shoots. Ultimately, her best work is indoor studios and headshots, and it didn't fit our wedding vision.
Part 2: Stationery
The thing I looked forward to the most was the chance to design all the stationery for the wedding. It was definitely a large endeavor, especially because I didn't have all the right tools, but it was still worth it to have everything exactly how I wanted it.
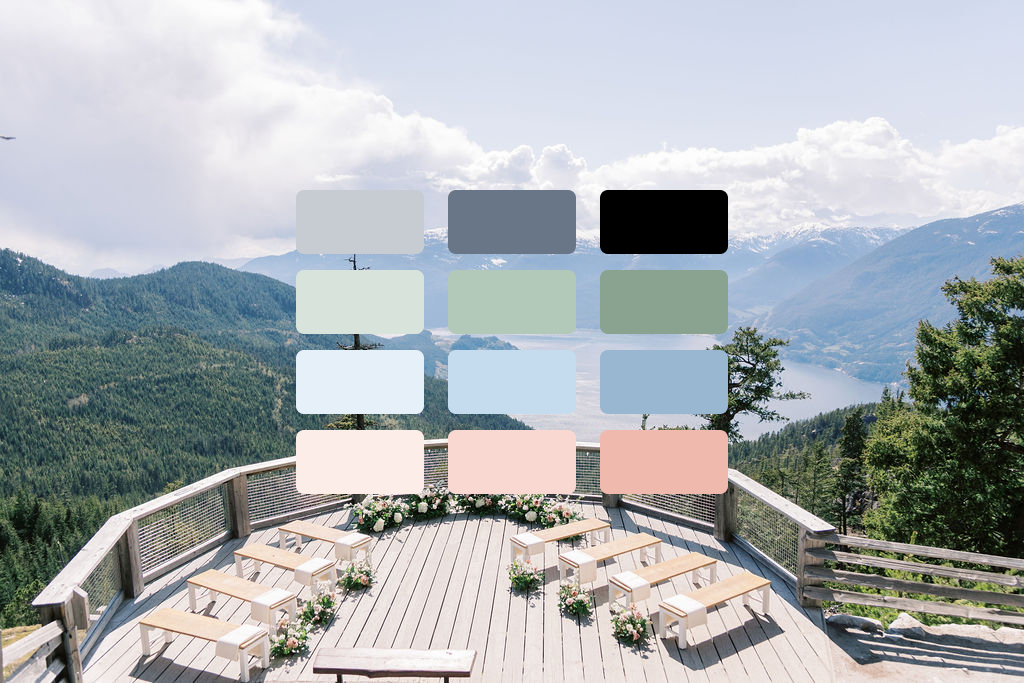
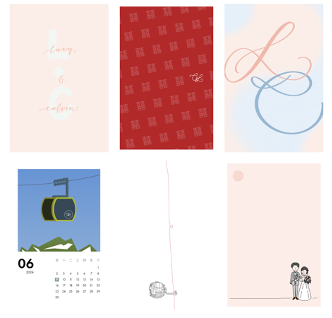
Design Guide
We started by creating a simple design guide, which included our colour palette, digital and handwritten fonts, and our wedding logo, so that everything could be cohesive throughout wedding planning. Ultimately, each phase of stationery design had its own unique style, but they all shared the same colour palette and fonts.
Save the Dates
Whoever started the trend of magnetic save the dates is a genius. Most of these things end up on the fridge and shrinking down to magnet size is so perfect. We made a custom die-cut magnet with our wedding logo, the wedding date, and our venue, in a scalloped circle shape that we kept consistent throughout all our stationery. We mailed these out to guests who wanted a physical save the date on a few different backing cards that matched our website theme.
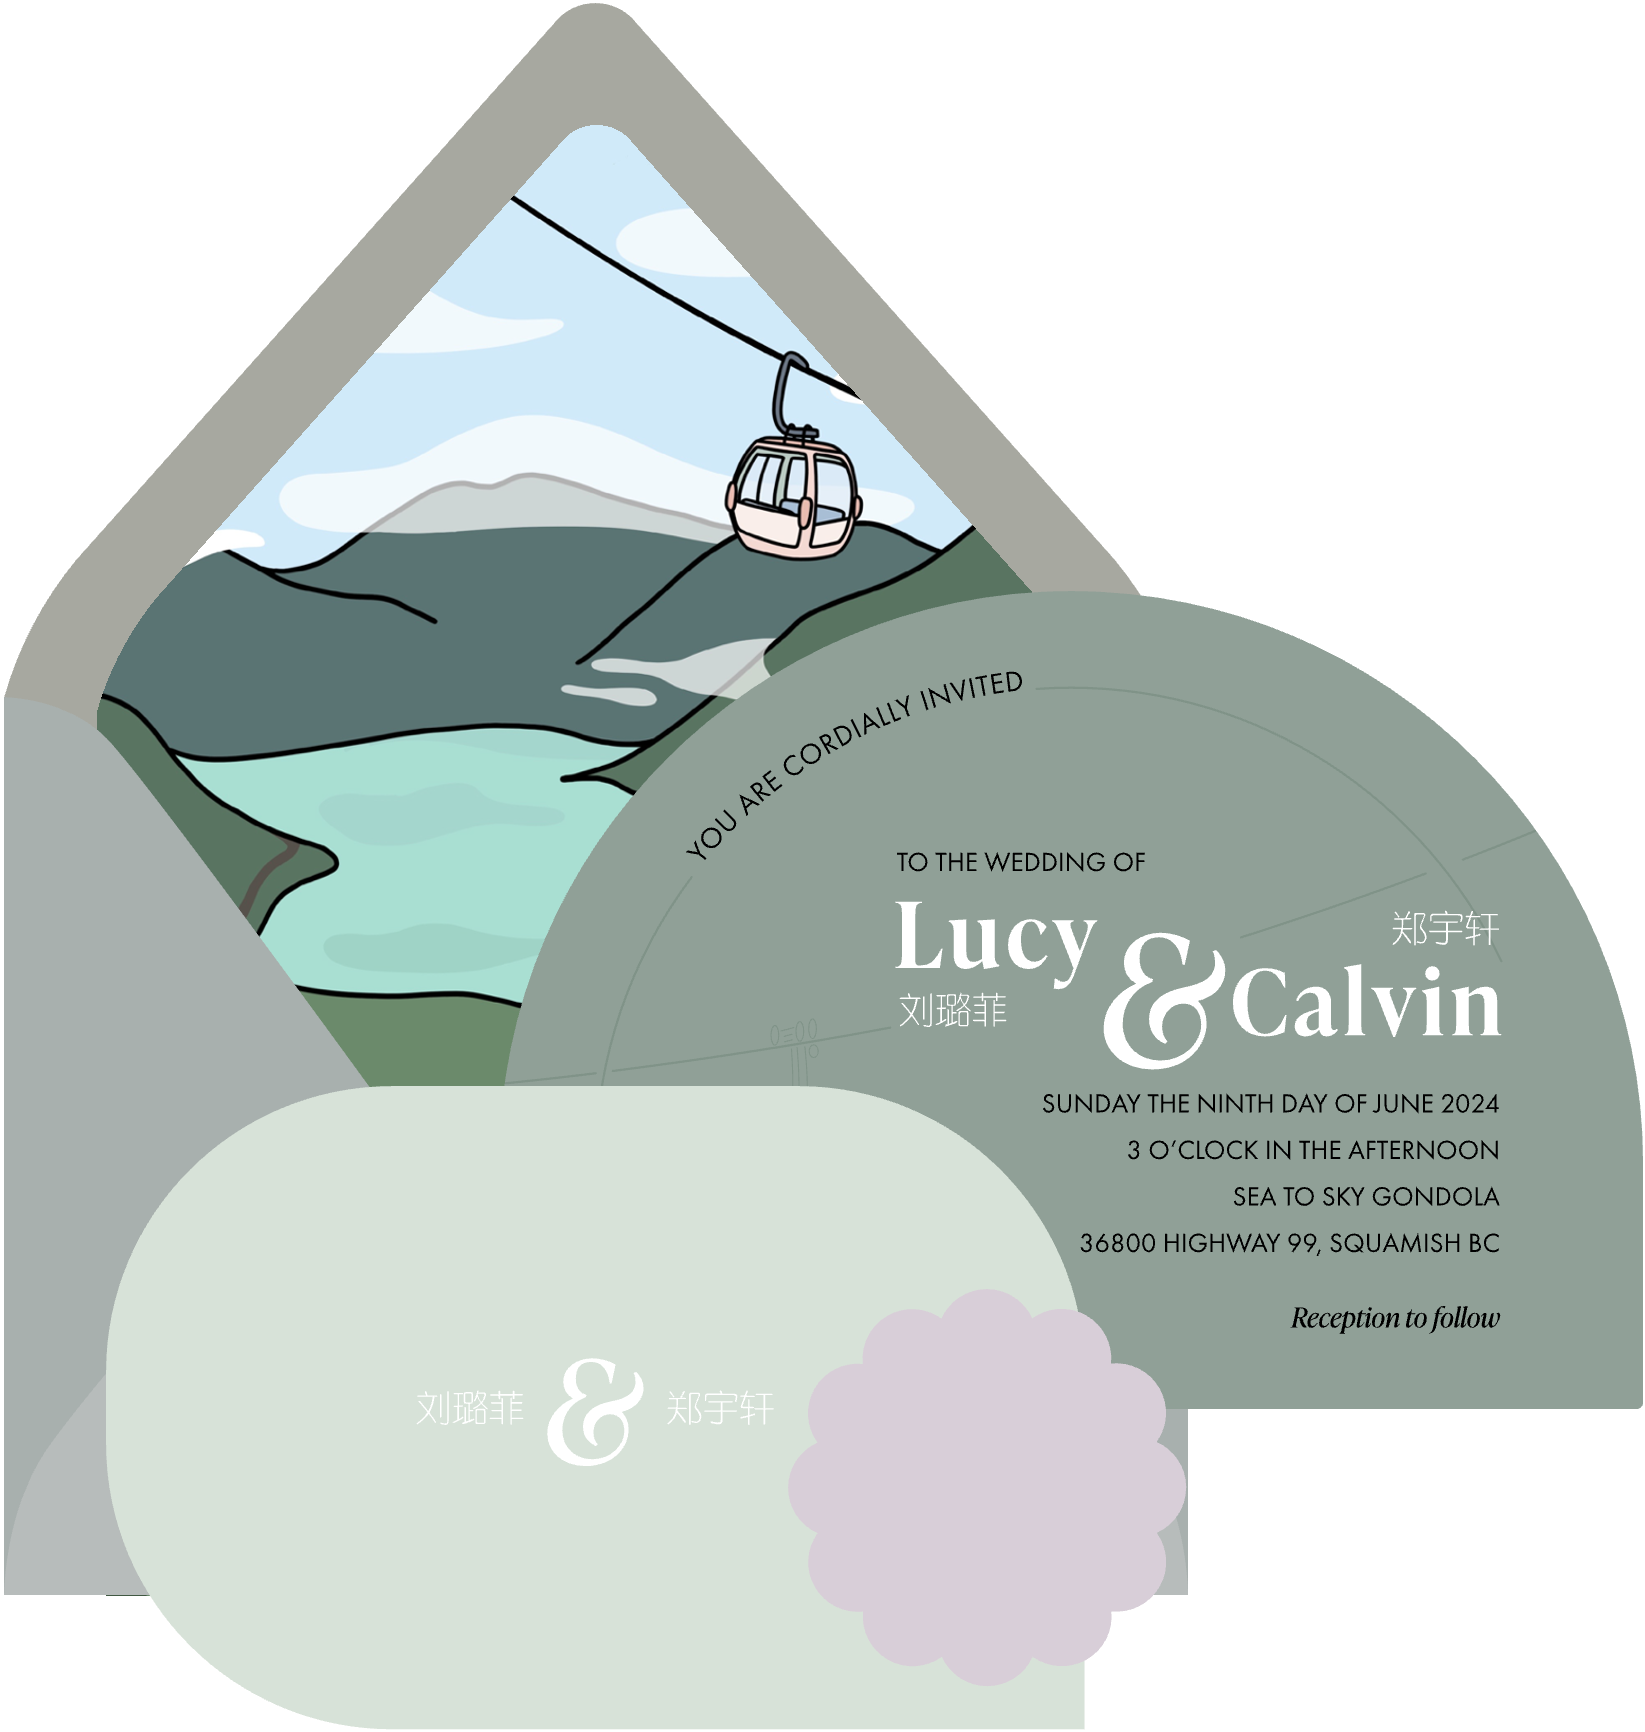
Invitations
Making invitations was a much more difficult endeavor than I anticipated. I truly underestimated the importance of having the right tools and how expensive those tools can be. It was also incredibly difficult to compromise between all our custom details and the limitations of high-quality print shops. We simply did not need enough invitations to justify the cost of a custom print job, but we also didn't want to settle for a generic template.
In the end, we made everything using the Cricut. It didn't turn out nearly as perfect as I wanted, but it was the best option we had available. I had my heart set on the beautiful thick cardstock from Pacific Paper, but buying a $1000 printer so that the 110-lb cardstock could feed through just didn't feel like a good investment. After a huge learning curve, lots of trial and error, and endless hours of babysitting the machine, we successfully got our die-cut invitations printed by Muji pens attached to the Cricut. We were also able to add a lot of embossed details using the Cricut scoring tool since the paper was so thick and even some foil accents as well. It honestly looked a lot like an arts and crafts project, but our guests still appreciated the effort and the personal touch.
Our RSVP cards used the scalloped circle shape from our save the dates and included a personal QR code for each guest that links directly to their own personal RSVP form on our website. Getting these QR codes were a lot of work as well since every invitation needed a unique QR code. We generated all the codes through Adobe and converted them to stickers manually using clear packing tape and washing them off the paper backing.
We assembled an invitation card, a details card, and an RSVP QR code card that were all tied together by ribbon and sealed into our euro flap envelopes with our custom envelope liner and our logo embossed. Since we designed and made everything ourselves, we couldn't settle on just one design and ended up making 3 different invitation suites that we sent out to different groups of guests.
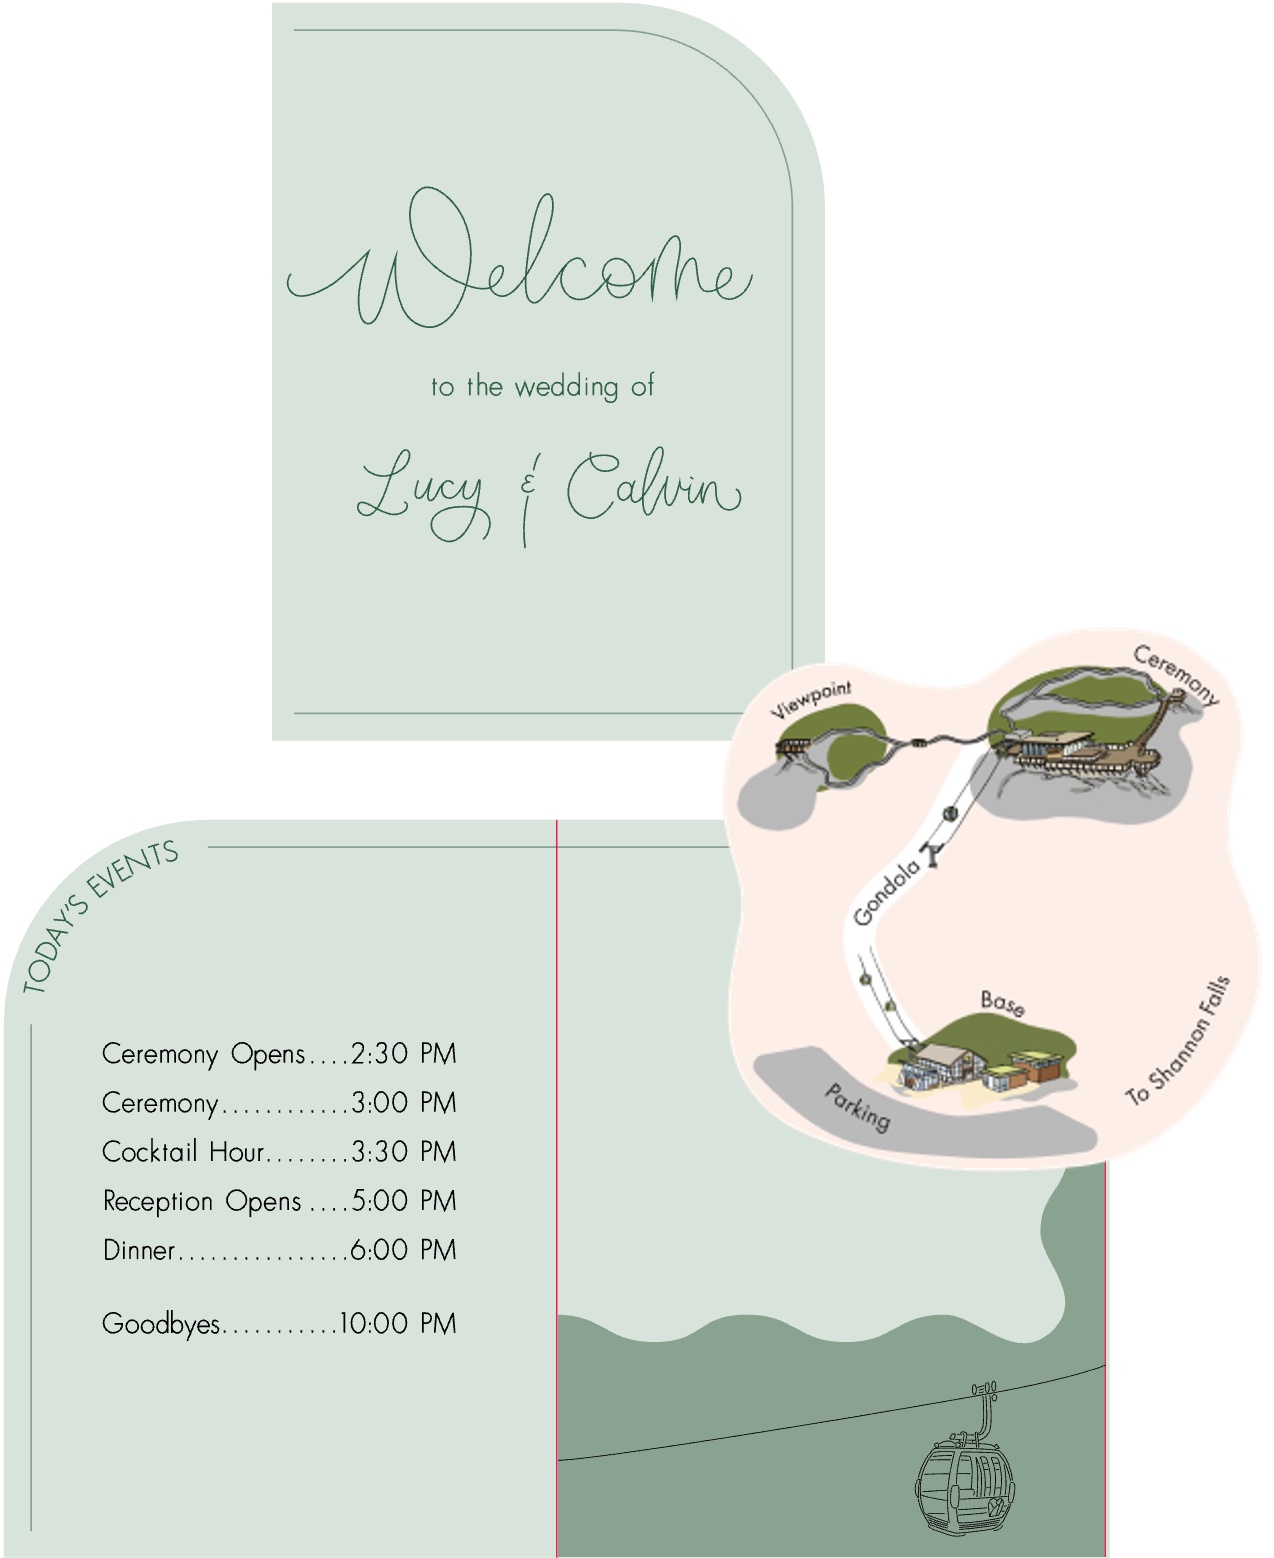
Programs
Making wedding programs turned out to be even more difficult than the invitations, despite having gone through the Cricut learning curve already. My vision was a folder style program that would have several insert cards and operate more like a wedding welcome packet. I had big visions of the many inserts I'd include but ultimately ran out of time and energy to make it come to life. Nevertheless, I stuck with the folder idea because I wanted a place for people to place their gondola tickets and photo booth prints.
After several prototypes and keeping with our wavy scallop theme, we designed a two-piece folder that could be glued together. The main piece included a welcome message and the schedule of events printed on the inside. These were printed at Staples and cut with the Cricut. The other piece used to create the folder was made from 110-lb cardstock and cut and scored with the Cricut. We even embossed a little gondola figure on the folder.
The items that did make it into the folder were the wedding program, a map of the venue, a keepsake magnet, and a fun little guest activity. The program was very simple, but the map of the venue was another little illustration project that we worked on together. It also included the QR code for our day-of website. The magnet was our wedding favour, with the intention of making a souvenir for our guests. We had a die-cut gondola magnet with an illustration of us inside the gondola. For the guest activity, we had a photo scavenger hunt and a wedding guest hunt, where guests had to find other guests with certain characteristics. It was a fun way to get people to mingle and get to know each other. Surprisingly, there was a lot of mingling between our guests and we were so happy to see everyone meet the other important people in our lives.
Menus
We chose tri-fold menus instead of individual menus for each guests since the meal was served family-style. We wanted to keep it simple since there isn't much you can do with tri-fold menus anyway. But we had to still make it special somehow. We designed the menus to be mountain shaped so it would look more interesting on the table and we also included a QR code that linked to our photo sharing site.
We also had two sets of bar menus at the bar. They were the typical bar menu with our signature cocktails and a separate menu with a list of other options. We found really nice arch shaped frames, which fit our other decor and stationery beautifully. The frames also allowed us to have a mix of printed menu card inside and handwritten notes on the glass.
Seating Chart
I knew the seating chart would be a large project, but it was what I looked forward to the most. A lot of thought went into choosing the right medium to display the seating chart. The most common choices are often a mirror or acrylic board, but I've always found both to be difficult to read because of the material. I also needed something that would be easier to change since I was the one making it. A lot of online advice suggested printing the seating chart per table so they could be easily swapped out, but I didn't like the asthetics of that choice either. To be honest, I didn't settle on my actual choice until only a few weeks before the wedding.
I decided to write the seating chart on the whiteboard side of a sandwich board we were already using as decor. I was struggling to find a purpose for the whiteboard side and I was struggling to choose a seating chart design, and one day it just clicked that both of those problems can be solved together! The size of our guest list also made it possible to fit on the board.
Writing the names, though, was a whole other challenge. It was quite difficult to freehand all the names in an organized way and the whiteboard was not kind to mistakes because the writing was such a high contrast against the background. I also had to test different markers and designs and it was super difficult to notice problems until the entire board was filled. I probably rewrote the seating chart 3-4 times before I reluctantly accepted the results.
After writing the seating chart, I realized the font was quite small, which would make it difficult for guests to find their names. I decided to add a QR code using vinyl that linked to a digital version on our website, where guests could search for their names to make it easier. It must have all worked out because everyone was sitting in the right place when we arrived.
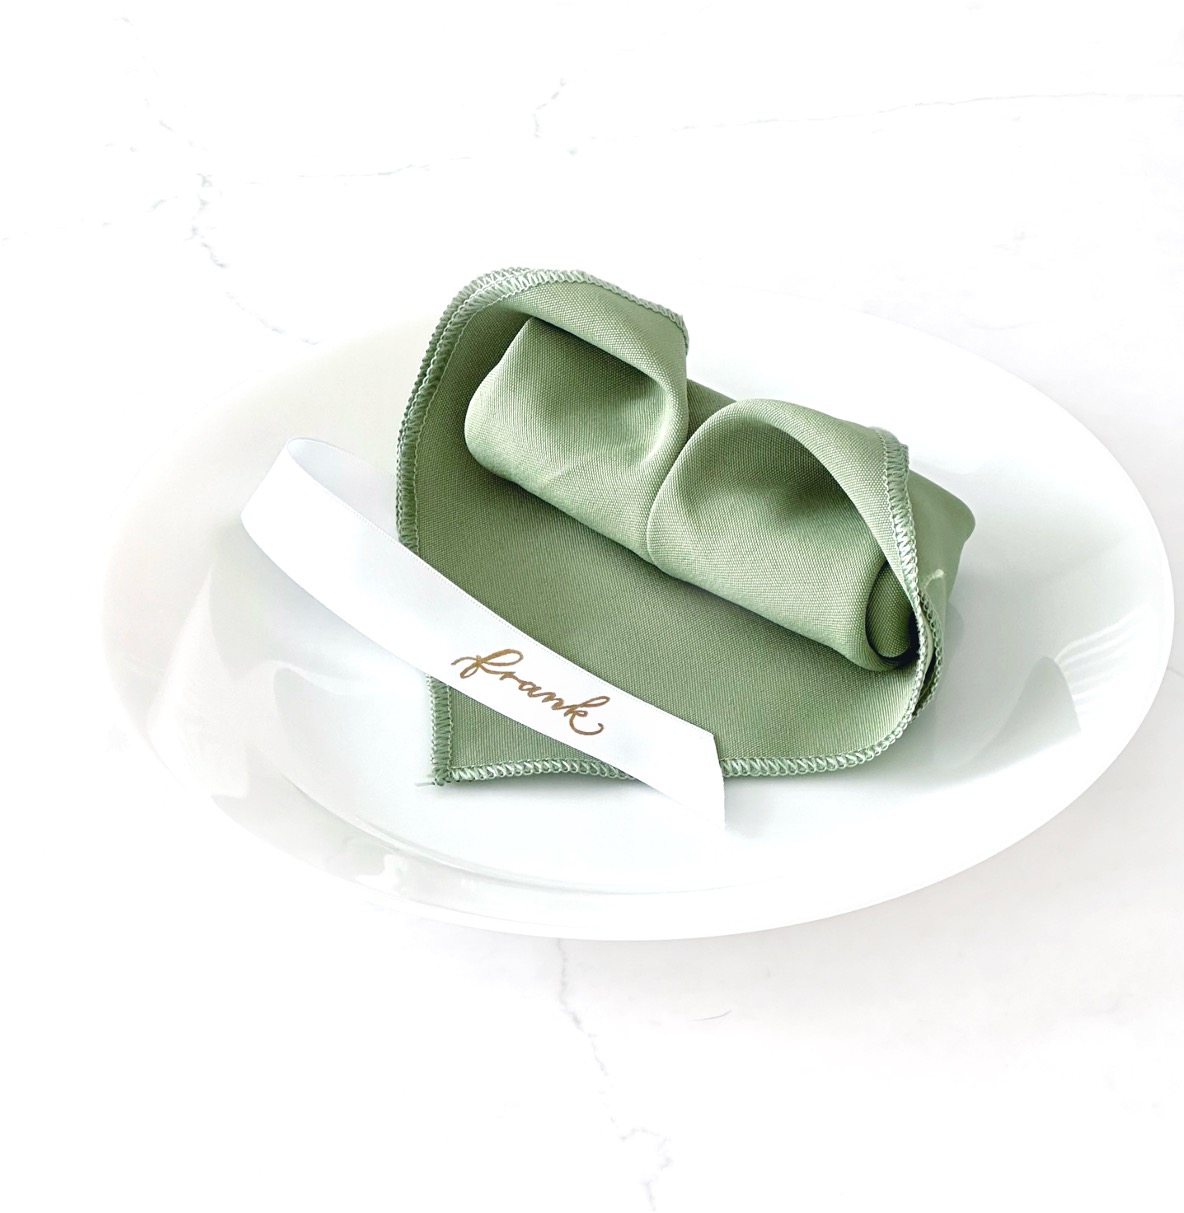
Place Cards
Obviously I needed to take advantage of hand lettering for the place cards. I wanted to find something that was clearly impossible to print but also more practical than options like leaves or oyster shells. The choice was ribbons.
It's so interesting because I've always loved ribbons and bows and they were always just a part of my identity, but the 2023-2024 trend of ribbons and bows everywhere made it so easy for me to find inspo and bow-themed decoration to make it all come together. The only sad part is it might look dated very soon when the trend fades, but I think it will always be true to me.
We chose to foil the names onto the ribbons and tie it around the napkins. The first few didn't turn out well because I didn't quite master the foiling pen yet. We also cycled through a few different combinations of ribbon and foil colours before we were able to find an option that was legible. It turns out the classic white and gold combo is classic for a reason.
The actually process was super tedious and painfully long. It was mostly relaxing to me but it still took a lot of time. Cutting and burning the edges of the ribbons already took a long time. Then, every piece of foil had to be cut to size and taped onto the ribbons. Ironically, writing the names was the fastest part of the process. I got nearly all of them done in one sitting and just had to double check on a few names before wrapping up the rest. The only downside was that this did not allow for any last minute additions and meant I had to be very organized with packing the napkins.
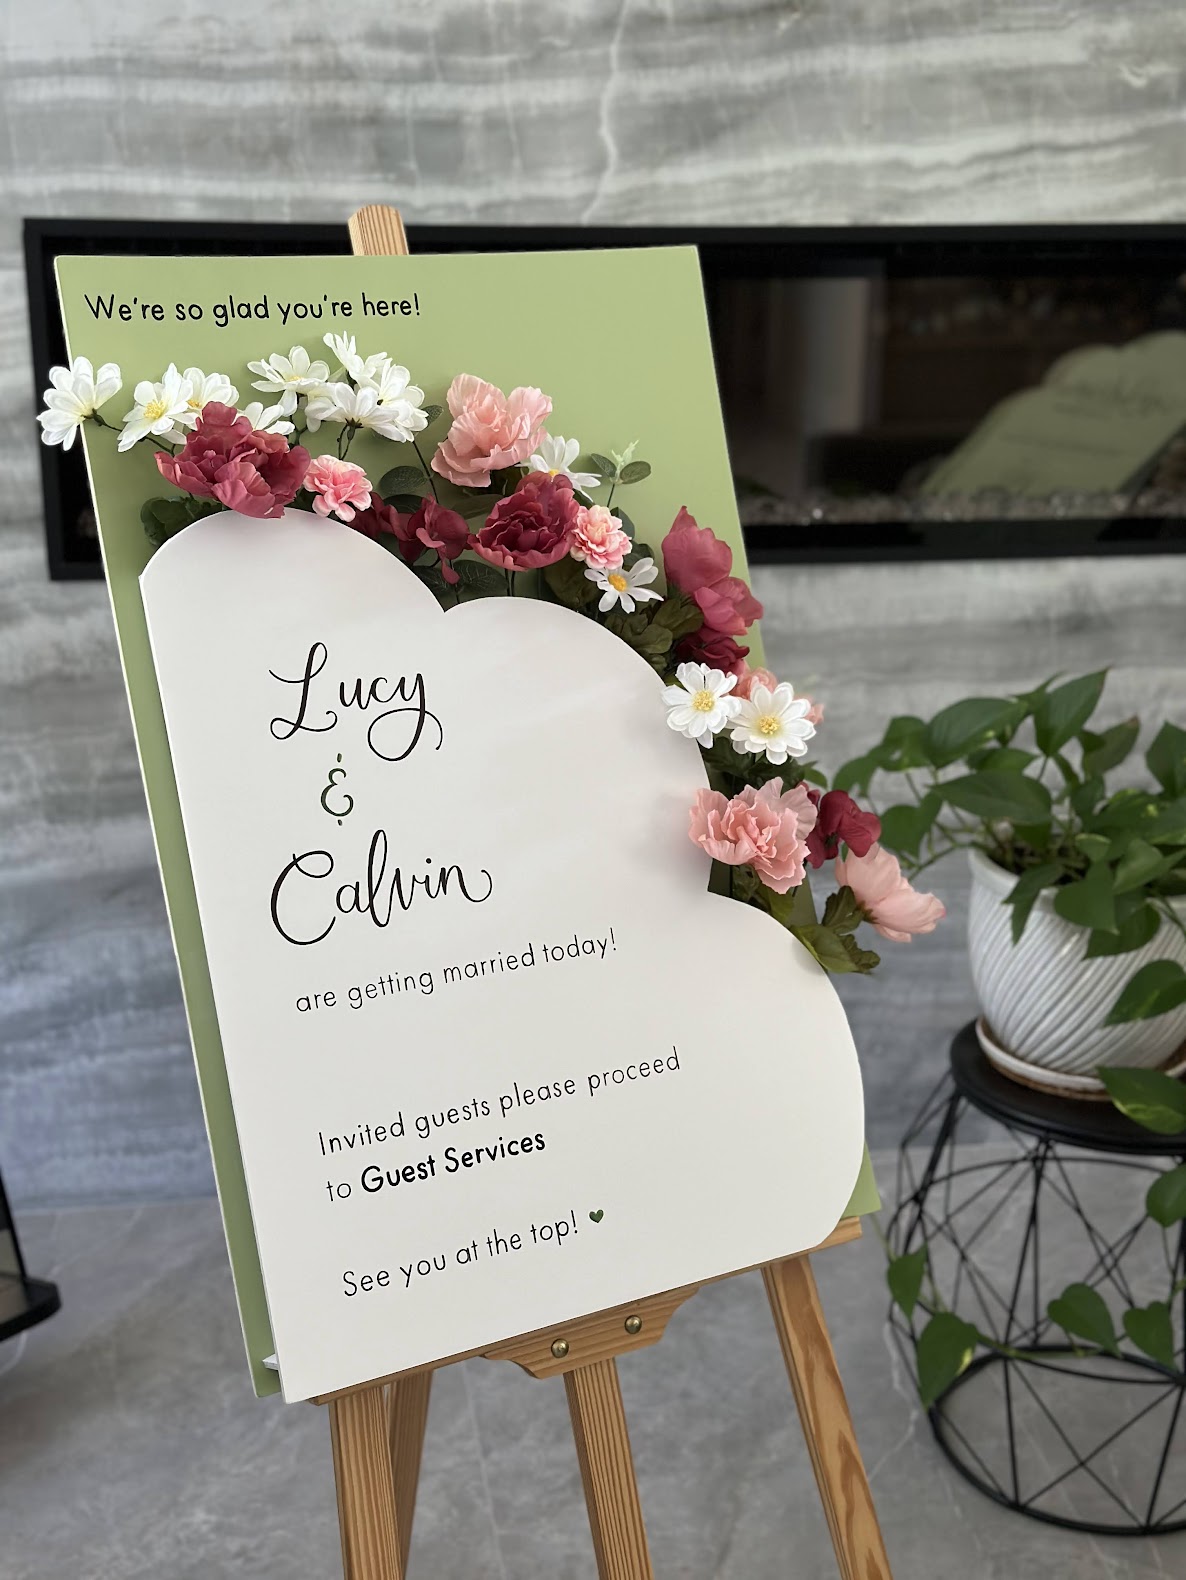
Signage
Signage is practically free for us so we added signs for everything. The highlights are the two welcome signs, one at the base of the gondola and one at the top. It was fun to be able to customize the wording to fit our venue specifically. We chose to use foam boards after learning they were available from the dollar store. Although, the process still took a few iterations because we quickly realized that writing on plain white foam boards was not very interesting visually. We ended up painting some foam boards with green paint to match our colour palette, but unfortunately, the paint made the boards curl which also made things quite difficult. The final signage featured a cut out and fake flowers to make it more like a flower box.
We also made a lot of other small signs around the venue. For example, a sign for the card box, a sign for the bubble wands, a sign for the amenities basket, ... You get the idea.
Part 3: Digital
Obviously, we had to make a custom website for our wedding. However, it was a much larger project than we anticipated since we wanted everything to be perfect and we are not actually web developers.
Save the Date
We kept our Save the Date very simple. We used a few photos from our engagement shoot as a carousel and made some simple illustrations to match our wedding atmosphere. We also included an "Add to Calendar" button so guests could add the date to their Google or Apple calendars through the .ics file and a form where guests could submit their mailing address to opt-in for physical wedding invitations.
Invitations
Since everything was custom made, I wanted the invitations to seamlessly integrate with our website for the ultimate guest experience. We made a custom RSVP page for every guest that was linked to their unique QR code on the invitation. Their individual links used URL parameters with their hashed guest code to pre-fill their names and allocated seats. This way, guests could clearly see if they were allocated a plus-one, the forms would only allow them to RSVP for the number of seats they were allocated, and no one could RSVP for someone else. We used FormSparks to collect the responses because they are a free service that processes regular HTML forms and sends the responses to our email. This was the perfect option for us because we wanted to build the form ourselves but didn't want to deal with the backend.
Our RSVP form also included fields for dietary restrictions, song requests, and a place for our guests to share their favourite memory with us. It was so fun to read all the responses! We also allowed guests to make a request for an additional plus-one guest. Since our venue had a strict capacity limit and we didn't want to overinvite, we decided to fill any extra seats with these plus-one requests. We felt that this was a better choice than keeping a B-list and potentially offending someone by inviting them last minute.
We also made a generic version of the online invitations for our families in China who could not attend the wedding. This way, they can feel included in the process and see the details of the wedding even if they're not officially on the guest list and could not RSVP. We also included a language toggle and translated the entire website into Chinese for them.
The rest of the website was filled with information about the wedding day and FAQs. We also included an interactive map of the venue, which was super fun to make, and our recommendations for things to do in Squamish.
Wedding Day
On our wedding day, we redesigned the website to serve as a point of reference for any information guests may need. We included everything from the previous version, but designed everything to better fit a mobile device since everyone would be using their phones. We also added a link where guests can share their photos and videos from the day.
The best feature we added to the day-of site was the digital seating chart. We formatted everything to look like the tables at the venue and included a search bar for guests to find their names. Names were listed in alphabetical order and would auto-scroll and highlight the seat when the name was found. This made it super easy for guests to figure out where they were sitting without having to crowd around a physical seating chart.
Another detail we added was a public site. Since we were in a public space, we added a QR code on our welcome sign that would link to a public version of the website. This way, people who happened to be at the venue could learn about the wedding and we could thank them for their understanding if they were inconvenienced by the wedding.
Other website details
Some fun little details we added to the website was a confetti feature. It was a super cute addition that just made the page feel extra special. We also designed our venue map to be interactive so that guests could see where each part of the wedding was taking place. We also included a countdown timer to the wedding day, just for fun.
Click for confetti!
Emails
For all communication with guests after we received their RSVPs, we sent out emails using Python from our customized email address using our personal domain. Sending emails with Python was super simple and it worked really well with our iCloud email. With Python, we were able to send out mass emails with personalized content for each guest. For example, we sent out an RSVP confirmation email that included their specific responses. We also sent out a reminder email a week before the wedding that included a confirm button so we could be sure they got all the necessary information. By sending these emails ourselves, without a third-party service, we could also easily separate out information that was not relevant to certain guests. For example, only guests riding our shuttle bus would receive the shuttle bus information and other guests received parking information instead.
Ideas that didn't quite make it
There were a lot of other ideas that didn't quite make it.
NFCs offer so many potential features but we were concerned guests wouldn't know how to use them.
We considered running the guest activities such as the photo scavenger hunt through a webapp, but didn't have enough time to try this out.
Custom GIPHY gifs would have been fun to have as well. But this was a low priority item and we felt it would be a lot of work to teach guests how to search for them and use them.
Part 4: Little Things
Since we didn't hire a wedding planner (only a coordinator), we designed every detail of the wedding ourselves. It was a lot of work, but it added so many personal touches and little easter eggs for our guests to discover. A lot of our inspiration came from Pinterest and Instagram over the year-long course of planning, but there were also a few things that came up themselves.
Postcard Guestbook
Everyone tries to be clever with their guestbooks these days but it all still turns out the same. I've seen countless polaroid guestbooks, Jenga guestbooks, painting guestbooks, and photo album guestbooks, and none of them really felt special to me. Even though postcard guestbooks were not that special either, I think we did a good job of making it unique to us by designing all the postcards ourselves to commemorate the wedding day. Because of this, it fit in perfectly with the rest of the wedding stationery and was a great way to get our guests to write us a message.
We made a ton of extra postcards as well so that guests could take some home as souvenirs. Our guests really enjoyed the keepsake and took a lot of postcards home with them.
Grand Entrance Presentation
One of my favourite special thing we had at our wedding was our grand entrance, which actually wasn't even my idea. I've seen videos of other grand entrances and it never feels very grand because walking in and waving to the guests is so short and the music is so abrupt. I like the idea of the grand entrance leading into a first dance so the music can flow better and the moment can last longer but unfortunately, we didn't have any space for dancing in our reception area. What we did instead was a grand entrance presentation that was specially prepared by the groom's sister and she got to give a short little speech and the video presentation lead into our grand entrance. It was definitely a grander way to execute the entrance and I was super happy with the results!
The video featured a slideshow of our childhood photos and all the similarities between us growing up. It was a great way to introduce us to the guests, especially those that are only familiar with one side. We chose a song that was very special to us and also quite cheesy and funny, which set a good tone for the rest of the evening. The video ended off with photos from our engagement and broadcasted our official introduction as the newly married couple.
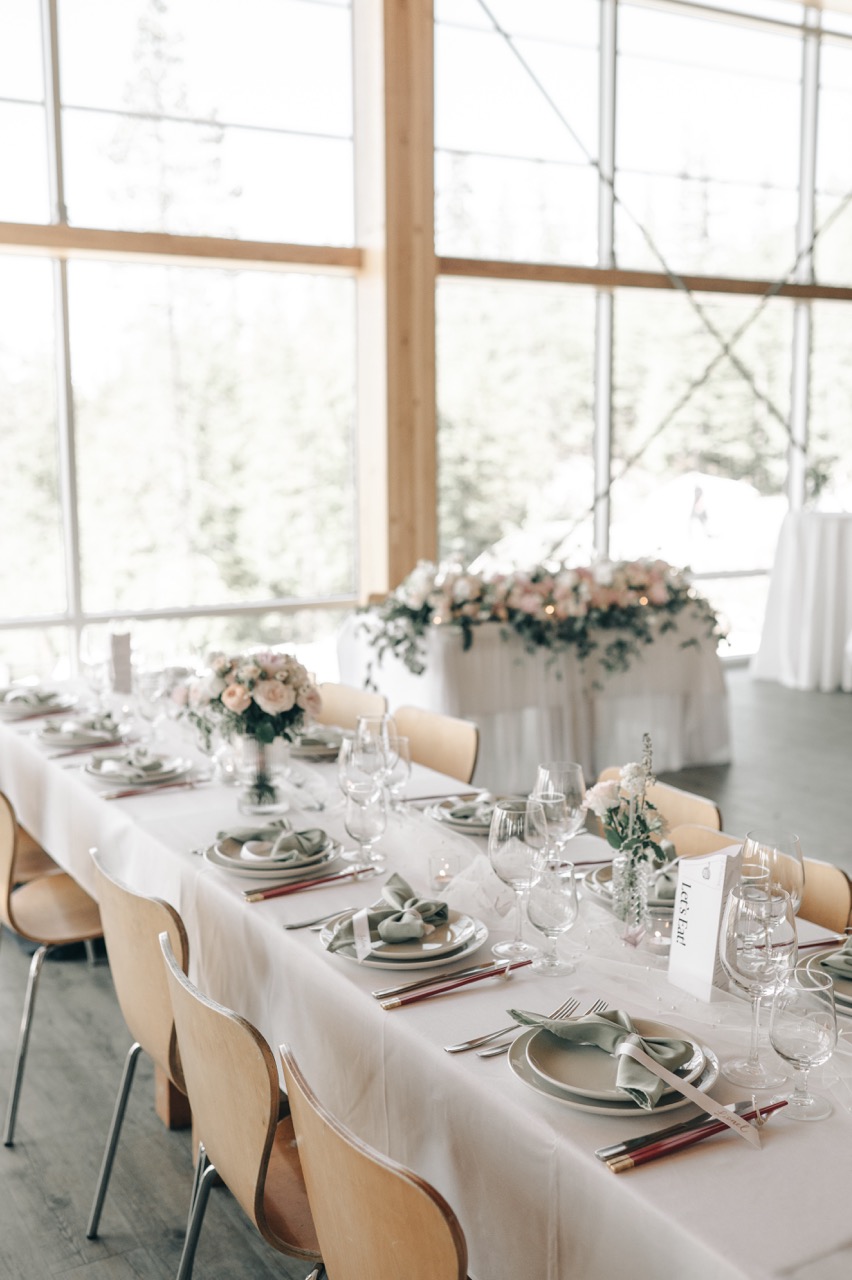
Reception Tables
We named our reception tables after places along the Sea to Sky corridor that we've visited together. Since there were 3 long tables, we made 3 categories from the sea, to the land, and up to the sky, like how the map looks from above. Keeping with the theme, we organized the locations geographically so that the tables would match the order of the locations on the map.
Along the sea, we had Bowen for Bowen Island, Porteau for Porteau Cove, and Britannia for Britannia Beach. On the land, we picked lakes including Murrin for Browning Lake, Garibaldi for Garibaldi Lake, and Wedgemount for Wedgemount Lake. Up in the sky, we chose mountains with Brunswick for Mount Brunswick, Stawamus for the Stawamus Chief, and Blackcomb for skiing in Whistler.
We drew a custom map of the Sea to Sky corridor and marked all the locations with pictures of us at each place. We also included a little blurb about each location at the guest tables so they could learn a bit more about why our venue was so special to us.
Mint to be
Another fun little detail that we added last minute were mints for each table. We got a bunch of different mints from Bulk Barn and packed them into little glass containers. We also topped the containers with a little sign cut to our scalloped circle shape that said "Mint to be".
Floral Bags
As part of all the amenities we prepared, we also had a handful of high quality plastic gift bags. Since we had real flowers in our decor, we wanted guests to take some home with them. I was worried about how they would carry them, so we prepared these little bags that they can use to pick out flowers and carry them home.
Part 5: Lessons
Not everything can be perfect and I've long made peace with that. The day was splendid and I have no regrets, but there are definitely some lessons learned that may have helped things go smoother.
Overcommunicate
The few things that went off track were definitely due to miscommunication, or more accurately, lack of communication. It's nearly impossible to remember to share every detail with every vendor, but it's so important to try.
The biggest delay of the day was from our catering staff serving dinner. It seems that they were waiting for the salad course to be finished before serving the main course, but we assumed each course would be served according to the predetermined schedule. This was definitely something we didn't even consider, but perhaps could have been avoided if we had more conversations with the catering staff ahead of time.
Another change was the execution of the photography shot list. We didn't send the list to our photographer since our coordinator was handling it. However, the coordinator was busy with some other things and the photographer took the initiative to get started on the list. It all worked out great because we got a better location than what was originally planned, but it did get a bit chaotic when different people were trying to coordinate the same shots.
Try everything together
It's definitely not always possible, but doing a full trial of everything including hair and makeup and also the dress and all the accessories would have been so helpful. There were a few things with my dress that didn't fit quite right and some logistics with my straps that I never considered. Had I spent more time in my wedding dress, I likely would have caught these things earlier and had them fixed before the wedding day.
I also never did a complete hair trial with my wedding day hair accessories. My hair trial doubled for my pre-wedding photoshoot, which featured a different hairstyle and different accessories. Although I loved my wedding day hair, it could have been improved if I cut my bangs a bit shorter and had more time to get used to the tiara I wore, so I'd know how to position it and how to keep it from falling off.
Cookie cutter isn't bad
I spent so much time trying to make everything unique and special, but experience should not be neglected. The cookie cutter options exist for a reason and they are often the best choice and the most reliable.
Leave time for dinner
Everyone says you won't have time to eat at your own wedding and they were right. I expected this and requested vendor meals for ourselves so we could eat quickly. What I didn't consider was that guests may also not have enough time to eat. We had a 3-course dinner and I allocated 1.5 hours for everything, which was not enough. The problem was only exacerbated by the slow service from the catering staff. I originally blamed the staff for the delay, but it turns out none of the guests noticed anything and they were completely happy with the pacing. In hindsight, dinner is when guests have the most time to relax and chat with each other, so it's important to give them extra time to enjoy the meal.